
Your printable paper craft guide: skills made easy
Whether you are opening your first paper craft template or tackling your tenth 3D model, starting without a clear plan wastes both time and materials. A good printable paper craft guide changes that entirely. It tells you what to cut, when to score, and how to assemble without guessing. This article walks you through everything: the right tools, the correct techniques, common mistakes to avoid, and a look at the project types that suit different skill levels. By the end, you will have a reliable framework for any paper craft project you choose to take on.
Table of Contents
- Key takeaways
- The printable paper craft guide to tools and materials
- Step-by-step execution from template to finished project
- Common challenges and how to fix them
- Project types and templates for every skill level
- Why patience beats technique every time
- Explore Craftsuprint for your next project
- FAQ
Key takeaways
| Point | Details |
|---|---|
| Choose the right paper weight | Cardstock between 65 and 110 lb gives most projects the durability and crispness they need. |
| Score before you fold | Running a bone folder along fold lines before creasing produces clean, professional edges every time. |
| Use multiple knife passes | When cutting thick cardstock, several light passes with a craft knife prevent ragged edges and slipping. |
| Read the template first | Numbered tabs and fold indicators on printable templates are your assembly roadmap. Study them before cutting. |
| Start simple, then progress | Simple greeting cards take around 20 minutes, while complex 3D models can take 7 or more hours. |
The printable paper craft guide to tools and materials
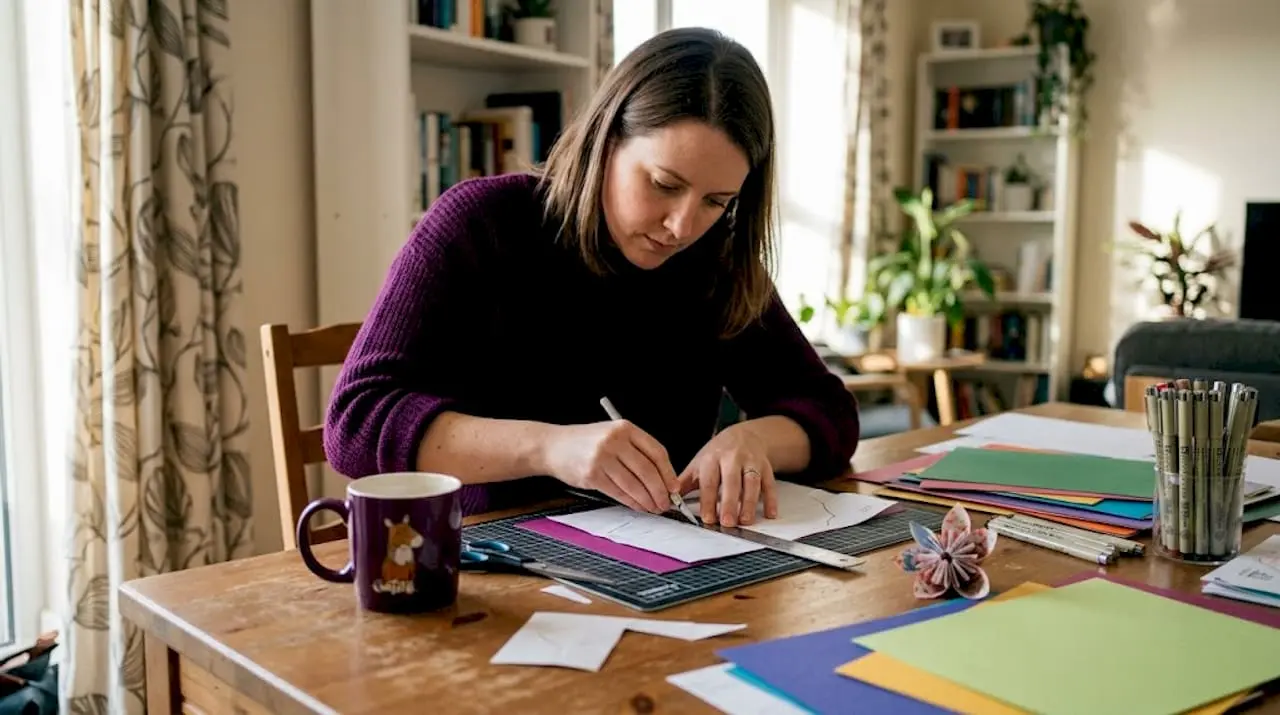
Getting your toolkit right before you start is not optional. The wrong paper or a blunt pair of scissors can ruin a perfectly good template before assembly even begins.
The core toolkit
Essential paper crafting tools include a colour printer, cardstock in the 65 to 80 lb range, scissors or a craft knife, a metal ruler, a scoring tool, and an adhesive such as a glue stick or white craft glue. Each item has a specific job, and substituting incorrectly causes problems. A regular office printer set to its highest quality setting works well for most home projects. A craft knife paired with a cutting mat gives you far more control on curves and intricate edges than scissors alone.
Cardstock weight affects durability more than most beginners expect. Lighter weights around 65 lb suit delicate folds and floral shapes. Heavier weights closer to 110 lb are better for structural elements like box bases and 3D frames. Using regular copy paper for a pop-up card, for instance, produces a flimsy result that will not hold its shape. Matching the paper to the project is one of the single biggest quality improvements you can make.
Tools at a glance
| Tool | Purpose | Cost level |
|---|---|---|
| Colour printer | Printing templates at high resolution | Medium |
| Cardstock (65 to 80 lb) | Main project material | Low |
| Craft knife | Precision cutting on curves and details | Low |
| Metal ruler | Straight-line cutting guide | Low |
| Bone folder or scoring tool | Creating crisp fold lines | Low |
| Cutting mat | Protects surfaces and holds paper steady | Low to medium |
| Glue stick or white craft glue | Adhering tabs and joints | Low |
| Clear tape | Reinforcing joins on complex models | Low |
Pro Tip: Keep your craft knife blades fresh. A dull blade drags and tears cardstock rather than slicing cleanly, and blade replacements cost very little compared to reprinting a damaged template.
Step-by-step execution from template to finished project
Following printable craft instructions in the right order makes all the difference between a clean result and a frustrating rebuild halfway through.
How to read your template before cutting anything
Printable templates use numbered or lettered tabs to indicate where glue goes and which edges connect. Dotted lines typically indicate valley folds (folding toward you), while dashed lines show mountain folds (folding away). Before you pick up scissors, spend a few minutes reading through the full sheet. Identify all the pieces, locate the numbered tabs, and mentally rehearse the assembly sequence. This single step prevents most of the errors that require starting over.
The assembly sequence
-
Print and inspect. Print your template at 100% scale with no scaling or fitting applied. Check that any reference measurements on the sheet match reality before cutting everything out.
-
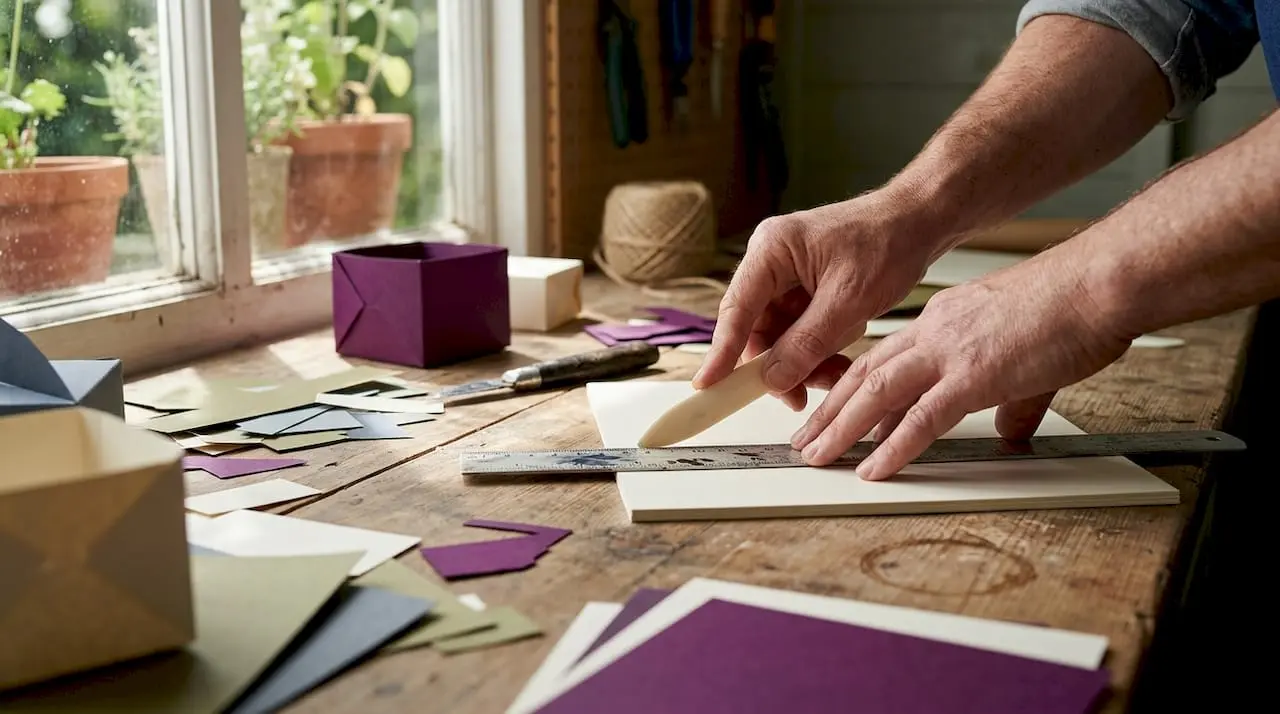
Score all fold lines first. Place your metal ruler along each fold line and run a bone folder or the back of a butter knife firmly along the line. Scoring before folding prevents tearing and gives you a precise crease every time.
-
Cut the outer edges. Use scissors for straight outer edges. Switch to a craft knife on a cutting mat for curves, tight corners, and internal cutouts. When working with thick cardstock, use multiple light passes rather than one heavy cut to keep edges clean and avoid the knife slipping across your design.
-
Fold all pieces before gluing. Complete every fold across the entire template before you apply any adhesive. This gives you a dry run of the structure and reveals any pieces that need adjustment.
-
Glue in sections. Work from the inside of the model outward. Apply adhesive to one tab at a time, press it firmly, and allow a few seconds for it to grip before moving on. For intricate paper craft for kids projects or large decorative sculptures, working in sections prevents the model from collapsing under its own weight mid-assembly.
-
Final checks. Once assembled, gently press all joins and check that all tabs are fully adhered. Leave the finished piece flat or propped in its final position while the glue cures completely.
Pro Tip: If your template has many identical pieces such as flower petals or box panels, cut and score them all before starting assembly. Working in batches keeps your workspace organised and speeds up the process significantly.
Common challenges and how to fix them
Even experienced crafters run into problems. Knowing what to look for saves you time and materials.
- Jagged cut edges. Usually caused by a dull blade or cutting too quickly. Slow down and replace the blade. On curves, rotate the paper rather than the knife to maintain control.
- Fold lines cracking or tearing. This happens when you skip scoring or press too hard. Always score lightly first, then fold gradually rather than creasing sharply in one motion.
- Glue wrinkling the paper. Excess glue causes wrinkling and staining. Apply a thin, even layer and allow it to become slightly tacky before pressing pieces together. Less is always more.
- Tabs not aligning. If numbered tabs do not line up when you try to join them, check whether you have scored and folded in the correct direction. A mountain fold used where a valley fold was intended shifts the whole geometry of the piece.
- Pieces printed too small or large. Always print at 100% with “fit to page” turned off. Even a 5% size difference can make tabs impossible to align accurately.
Pro Tip: Before committing to your good cardstock, do a test run on plain copy paper. Fold, cut, and partially assemble to check the template logic. It costs almost nothing and reveals problems before you invest in quality materials.
Precision is not perfectionism. It is simply giving your project the best possible chance of working the way it was designed to. Even a few seconds of careful alignment at each stage adds up to a noticeably better result.
Project types and templates for every skill level
Printable paper crafts range from simple greeting cards to elaborate 3D sculptural models, making them genuinely accessible for beginners and satisfying for experienced crafters alike.
Matching projects to skill levels
For complete beginners, flat greeting cards and simple pop-up designs are the ideal starting point. These projects involve basic cutting and folding with minimal assembly. Free printable crafts in this category are widely available online and require nothing beyond a printer and basic tools. For more detail and variety, platforms like Craftsuprint offer downloadable card making packs with printable craft instructions built into the files.
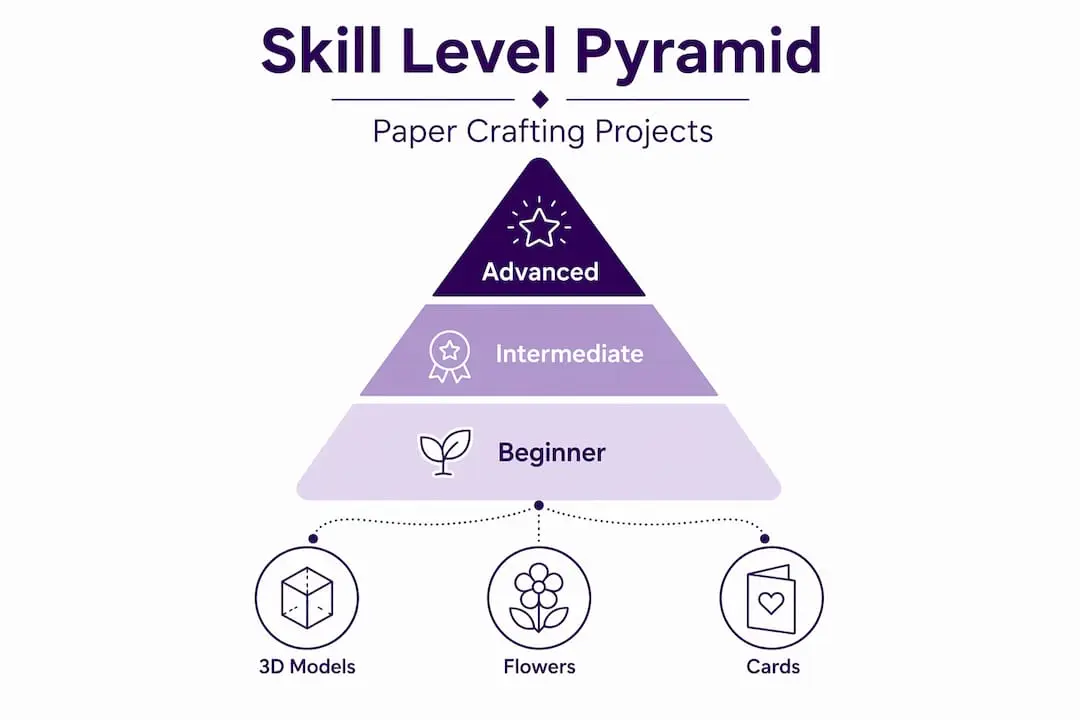
Intermediate crafters tend to enjoy paper flowers, small decorative boxes, and lanterns. These involve more pieces and more gluing steps, but the techniques are extensions of the beginner skills you already practise. Fun paper activities in this range also work brilliantly as paper craft for kids when an adult guides the trickier cutting steps.
Advanced projects include multi-part 3D origami animals, architectural models, and pop-up book mechanisms. These reward patience and precision above all else. If you are interested in how traditional craft skills apply to downloadable guides more broadly, paper and traditional craft techniques share many of the same principles around scoring, assembly, and patience.
Project comparison at a glance
| Project type | Difficulty | Key materials | Estimated time |
|---|---|---|---|
| Flat greeting card | Beginner | 65 lb cardstock, scissors | 20 to 30 minutes |
| Pop-up card | Beginner to intermediate | 80 lb cardstock, craft knife | 45 to 90 minutes |
| Paper flower bouquet | Intermediate | 65 to 80 lb cardstock, wire | 1 to 3 hours |
| Decorative box | Intermediate | 80 lb cardstock, bone folder | 1 to 2 hours |
| 3D origami animal | Advanced | 80 to 110 lb cardstock, cutting mat | 3 to 7+ hours |
For sourcing paper craft templates, you have both free and paid options. Free printable crafts are plentiful across craft blogs and community sites. Paid templates from curated marketplaces tend to offer cleaner files, clearer instructions, and more original designs. If you are looking for fun paper activities that the whole family can join in on, DIY paper kits and printable sets from curated craft collections give you everything in one download.
Why patience beats technique every time
I have been working with printable paper crafts for years, and the single most common mistake I see is rushing. People print a template, grab their scissors, and start cutting before they have even read the fold indicators. Then they wonder why nothing lines up.
In my experience, the crafters who produce the cleanest results are not necessarily the most technically skilled. They are the ones who pause. They score every line. They do a dry assembly before gluing. They replace their blade after every few projects. These are not advanced techniques. They are habits.
I have also noticed that people underestimate how meditative this craft actually is. Sitting down with a complex 3D template and working through it piece by piece has a genuine calming quality. There is no screen, no notification, no multitasking. Just paper, a blade, and a problem to solve one fold at a time. That is a genuinely valuable thing to have in your week.
My honest advice: forget the complex projects for now if you are just starting. Make ten greeting cards first. Make them carefully. When those feel easy, move up. The skills transfer directly, and your enjoyment of the harder projects will be far greater because of it.
— Rob
Explore Craftsuprint for your next project
If you are ready to put these techniques into practice, Craftsuprint is an excellent place to find your next template.
Craftsuprint offers an extensive range of downloadable paper craft projects covering all skill levels, from simple card making kits to detailed themed designs. Every download comes ready to print, with clear layouts and assembly guidance built in. Whether you are looking for seasonal greeting cards, decorative mini kits, or more ambitious paper craft templates, the platform has options to suit. Craftsuprint also features tutorials and weekly freebies, making it a genuinely useful resource to return to as your skills grow. Browse the full catalogue and find a project that matches where you are right now.
FAQ
What paper weight is best for printable paper crafts?
Cardstock between 65 and 110 lb is ideal for most paper craft projects. Lighter weights suit detailed folds and floral shapes, while heavier cardstock works best for structural models and boxes.
How do I get clean folds on thick cardstock?
Score each fold line with a bone folder or blunt tool along a metal ruler before folding. This prevents tearing and gives you a sharper, more accurate crease.
Where can I find free printable paper craft templates?
Free templates are available across craft blogs and community websites. Craftsuprint also offers weekly free downloads alongside its paid catalogue for hobby crafters of all skill levels.
How long does a typical paper craft project take?
Time varies widely by complexity. Simple greeting cards take around 20 minutes, while detailed 3D models can require well over 7 hours depending on the number of parts and assembly steps.
Are printable paper crafts suitable for children?
Yes. Many paper craft for kids projects are designed specifically for younger crafters, using simple cutting and folding steps. Adult supervision is recommended when craft knives are involved.