
What is a fancy fold card: a complete guide
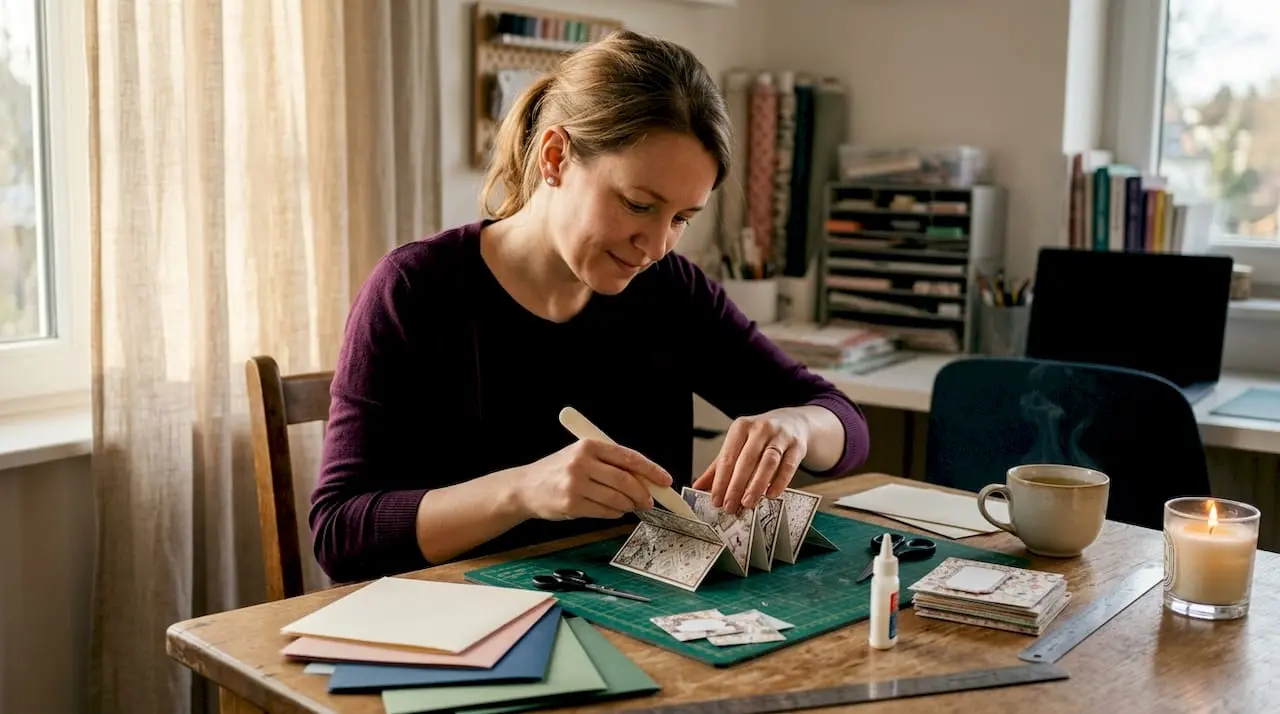
TL;DR:
- A fancy fold card uses non-traditional folding techniques to create interactive and visually engaging designs. It stands out because it offers an active experience for the recipient, making a simple greeting memorable.
A fancy fold card is defined as a handmade greeting card that uses non-traditional folding structures to create interactive, visually engaging designs beyond the standard centre fold. Also known in the crafting community as a “fun fold card,” this style encompasses techniques such as gatefold, accordion, pop-up mechanisms, circle pop-outs, and panoramic accordion folds. The appeal is immediate: the recipient does not simply open a card. They unfold, pull, or expand a small piece of engineered paper art. Popular styles as of early 2026 include triple bridge folds and cascading gatefolds, reflecting how the crafting community continues to push creative boundaries. Whether you are making fancy fold birthday cards or celebration pieces for any occasion, the technique transforms a simple greeting into a memorable keepsake.
What is a fancy fold card and why does it stand out?
A fancy fold card stands out because it replaces the passive act of reading with an active experience. The recipient interacts with the card physically, which makes the moment of opening far more memorable than receiving a flat, standard design.
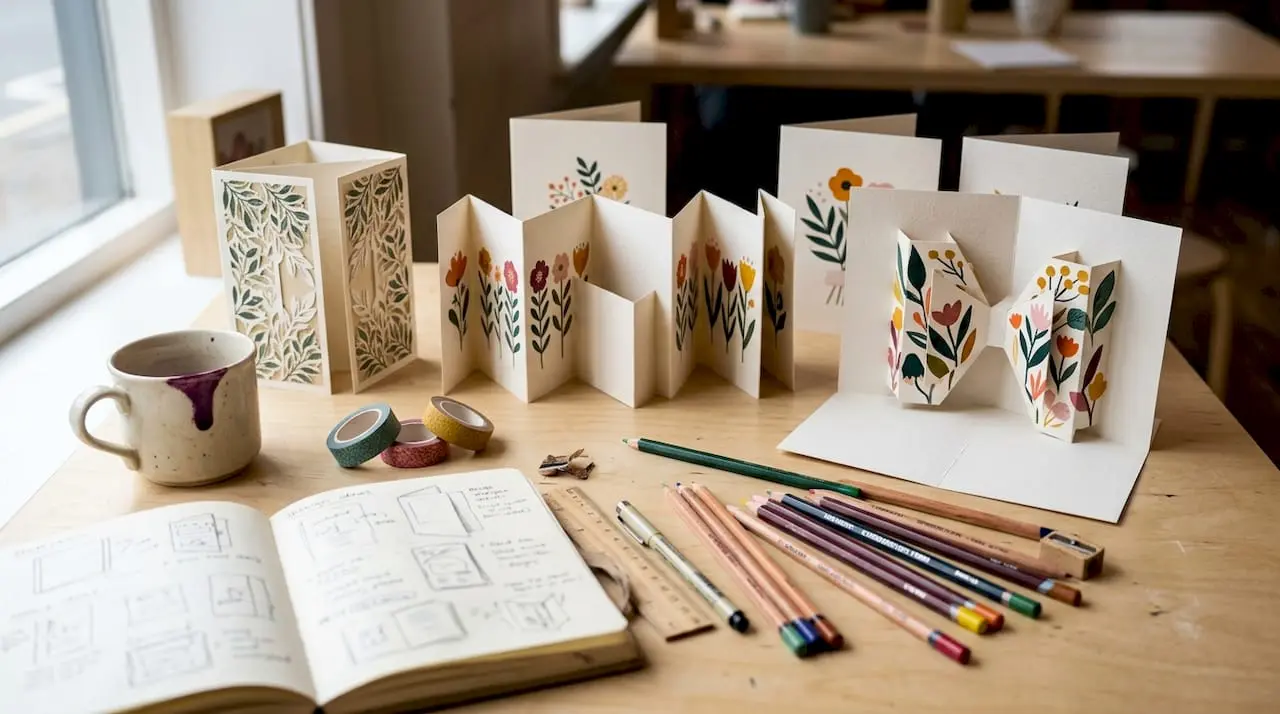
The wow factor it delivers is the primary reason crafters invest time in these techniques. A well-made fancy fold card signals personal effort and creativity in a way that a shop-bought card simply cannot replicate.
The term “fun fold” is the recognised industry phrase used widely in cardmaking communities, tutorials, and craft publications. “Fancy fold” is the more descriptive, search-friendly variant of the same concept. Both terms refer to the same category of card, and you will encounter them used interchangeably across tutorials, craft blogs, and digital download platforms like Craftsuprint.
The core distinction between a fancy fold card and a standard card lies in the folding mechanic. A standard card has one fold and opens flat. A fancy fold card has multiple scored lines, panels, or mechanisms that create movement, depth, or a reveal when opened. That structural difference is what makes these cards so satisfying to both make and receive.
What are the main types of fancy fold cards?
The crafting world recognises a wide range of popular fold styles, each with its own mechanics and best-use occasions. Understanding the differences helps you choose the right technique for your project.
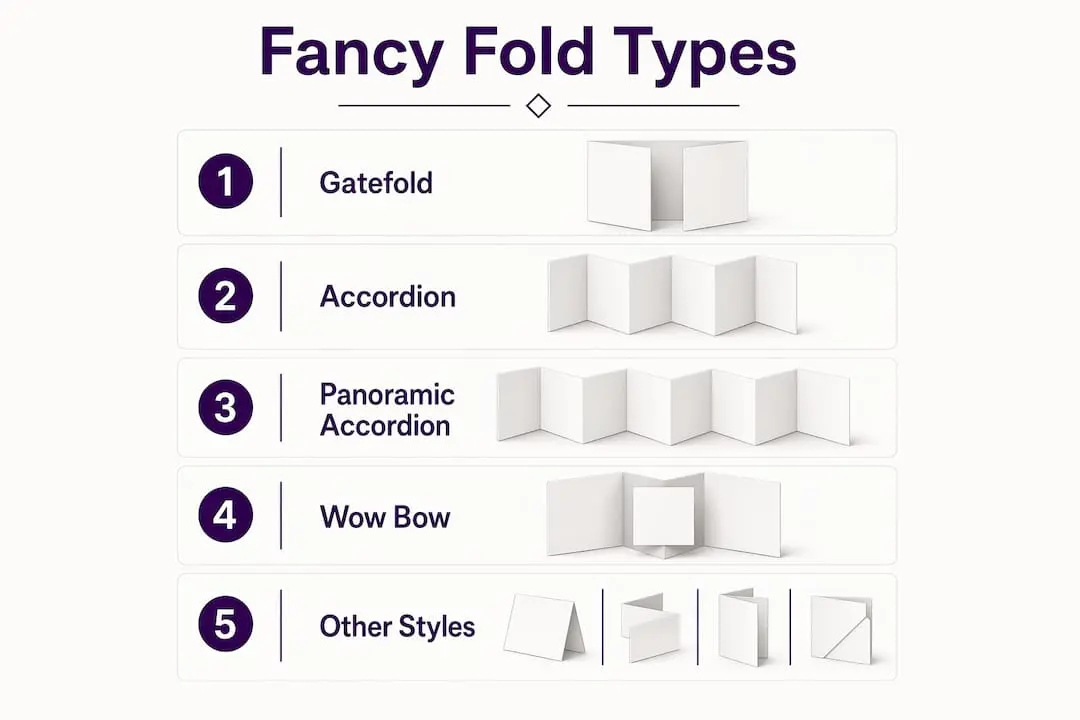
| Fold type | How it works | Best occasion | Skill level |
|---|---|---|---|
| Gatefold | Two panels open outward from the centre | Weddings, announcements | Beginner |
| Accordion | Multiple panels fold in alternating directions | Birthdays, travel themes | Beginner |
| Triple bridge | Three arched panels rise when opened | Floral, spring, celebration | Intermediate |
| Circle pop-out | A circular element pops forward on opening | Birthdays, Christmas | Intermediate |
| Panoramic accordion | Wide scene unfolds across multiple panels | Landscapes, storytelling | Advanced |
| Wow Bow | Single sheet folds to reveal both sides of patterned paper | Everyday, gift tags | Beginner |
The gatefold is the most accessible starting point for new crafters. Two panels meet at the centre and swing open to reveal the interior, creating a natural sense of anticipation without requiring complex scoring.
The accordion fold uses alternating mountain and valley folds to create a concertina effect. It suits birthday cards beautifully because you can layer images or sentiments across each panel, building a visual story as the recipient unfolds the card.
The panoramic accordion is the most ambitious of the group. It creates a wide, continuous scene that only becomes visible when the card is fully extended. This fold suits landscape themes, travel cards, or any design where a sweeping visual narrative adds impact.
Pro Tip: Start with the gatefold or accordion before attempting the panoramic accordion. Both teach you the core skill of precise, even scoring, which underpins every other fold type.
The Wow Bow fun fold card is a particularly clever design because it uses a single 6x6 inch sheet of designer paper and showcases both sides of the patterned paper in the finished card. That efficiency makes it ideal when you want a striking result without using a large amount of material.
What materials and tools do you need for fancy fold cards?
The right materials make the difference between a card that lies flat and performs beautifully and one that buckles, warps, or refuses to open cleanly. Typical supplies include cardstock, a paper trimmer, a scoring tool, adhesive, and designer paper, with measurements often provided in concise PDF guides built around standard paper sizes to minimise waste.
Essential tools
- Cardstock: The base of any fancy fold card. Use 80lb or 90lb weight for the main card base to hold its shape through multiple folds.
- Paper trimmer: Straight, accurate cuts are non-negotiable. A trimmer with a built-in scoring blade saves time.
- Scoring tool: A dedicated scoring stylus creates a clean channel in the paper without cutting through it, which is what allows a crisp fold.
- Bone folder: Used to burnish each fold after scoring, pressing the crease flat and sharp.
- Adhesive: Liquid glue, tape runner, or foam pads depending on the layer you are attaching.
- Designer paper: Patterned paper that adds colour and texture. Many projects use a single 6x6 inch sheet.
Optional but useful equipment
- Die-cutting machine for shaped panels and decorative elements
- Embossing folders for textured backgrounds
- Foam adhesive pads for raised, dimensional layers
- Ruler and pencil for marking score lines before committing
Standard paper sizes matter more than most beginners realise. Projects built around 8.5x11 inch or 6x6 inch sheets produce less waste and align with the measurements given in most downloadable tutorial guides. Buying designer paper in these standard sizes means your cuts will match the instructions without any conversion.
Pro Tip: Always test your adhesive on a scrap piece of the same cardstock before applying it to your finished card. Some adhesives bleed through thinner papers or leave a residue that shows through light-coloured designer sheets.
Placing patterned paper before die-cutting or folding avoids alignment errors and creates a polished, professional finish. This single habit separates tidy, gallery-worthy cards from those that look slightly off-centre. Lay your designer paper onto the card base and confirm the pattern placement before you score a single line.
Craftsuprint offers a range of designer papers and supplies suited to fancy fold projects, including printable sheets that you can size and print at home to match your chosen fold dimensions exactly.
How to make fancy fold cards: tips, tricks, and pitfalls
The creation process rewards patience and punishes rushing. Precision in scoring is more critical than cutting. A slightly rough cut edge is barely visible in a finished card. A poorly scored fold line, however, creates a crease that wanders, a panel that does not sit flat, and a card that looks amateurish regardless of how beautiful the decoration is.
Step-by-step: a simple Up Down Up fold
This fold is one of the most beginner-friendly fancy fold card ideas and teaches the core principles that apply to more complex designs.
- Cut your cardstock to 11 inches by 4.25 inches.
- Score at 2.75 inches, 5.5 inches, and 8.25 inches from the left edge.
- Fold the first score line upward (mountain fold).
- Fold the second score line downward (valley fold).
- Fold the third score line upward (mountain fold).
- Burnish each fold firmly with a bone folder.
- Decorate each panel before assembling, as access becomes limited once the card is folded.
- Attach your sentiment or focal image to the front-facing panel.
- Add adhesive to the back panel only and mount onto a card base if desired.
Many fancy fold designs rely on simple, repetitive scoring rather than complex cutting, which means beginners can achieve impressive results quickly. The Up Down Up fold demonstrates this perfectly. Three score lines and three folds produce a card with real visual depth and movement.
Common pitfalls and how to avoid them
Over-gluing near fold lines is the most frequent beginner mistake. Excess adhesive near folds restricts the card’s ability to open smoothly and can cause warping, especially in slider or cascading mechanisms. Apply adhesive only to the areas that need to be fixed permanently, and keep it well away from any active fold line.
Skipping the bone folder is the second most common error. Scoring creates the channel; burnishing with a bone folder sets the crease. Without burnishing, folds remain soft and the card will not hold its shape reliably. Run the bone folder firmly along every score line, using a ruler as a guide to keep the pressure straight.
Cutting before planning paper placement leads to patterns that end up in the wrong position after folding. Always lay your designer paper onto the card base and mark where the pattern will land once the card is folded. Only then should you trim and adhere.
Pro Tip: Decorate individual panels before assembling the full card. Once a multi-panel card is folded and glued, reaching into tight interior spaces becomes awkward and risks smudging wet ink or adhesive.
Professional appearance depends on careful planning of designer paper placement before folding or die-cutting. This is the single habit that most visibly separates a polished card from a rushed one. Spend two minutes planning before you cut, and the finished result will look like it took twice as long to make.
How do you mail and present fancy fold cards?
Mailing a fancy fold card requires a little more thought than posting a standard greeting. The good news is that most designs fit neatly into common envelope sizes without modification.
Standard envelopes measuring approximately 5.5 inches by 4.25 inches accommodate the majority of common fancy fold designs when the card is folded to its closed position. This is the A2 envelope size used widely in the UK and US crafting communities, and most fold tutorials are designed with this envelope in mind.
The challenge arises when layers and embellishments are added. Multiple layers and embellishments often cause fancy fold cards to exceed standard postage thickness, so measuring the finished card before addressing the envelope is always worth doing. Royal Mail in the UK and postal services in other countries apply surcharges to items that exceed standard thickness or weight limits.
Mailing checklist for fancy fold cards
- Measure the folded card thickness before sealing the envelope.
- Weigh the finished card with its envelope to confirm postage requirements.
- Check whether embellishments such as brads, buttons, or thick foam layers trigger a non-machinable surcharge.
- Use a padded envelope for cards with raised or fragile elements that could be crushed in sorting machinery.
- Flatten accordion or multi-panel cards gently before inserting them into the envelope to avoid crumpling panels.
For gifting in person, a fancy fold card needs no envelope at all. Present it tied with a ribbon, tucked inside a gift bag, or displayed standing open so the recipient can see the full design before they even touch it. The panoramic accordion fold is particularly striking when displayed open on a mantelpiece or shelf, which makes it a gift in its own right rather than simply a card.
Pro Tip: Write your message inside the card before adding any dimensional embellishments. A thick brad or button on the front panel can make the card rock slightly when you try to write inside it, causing uneven pen strokes.
Key takeaways
A fancy fold card is a handmade greeting card built on non-traditional folding techniques that turn a simple greeting into an interactive, memorable keepsake.
| Point | Details |
|---|---|
| Definition is clear | A fancy fold card uses non-standard folds such as gatefold, accordion, or pop-up to create interactive designs. |
| Beginners can start easily | Simple folds like the gatefold and Up Down Up rely on repetitive scoring, not complex cutting. |
| Scoring precision matters most | Use a scoring tool and bone folder on every fold line to produce crisp, flat results. |
| Adhesive placement is critical | Keep glue away from active fold lines to preserve movement and prevent warping. |
| Mailing needs extra thought | Measure thickness and weight before posting, as layers and embellishments can trigger postage surcharges. |
Why fancy fold cards changed how I think about handmade greetings
The first fancy fold card I ever made was a gatefold. I scored it slightly off-centre, the panels did not meet cleanly, and I nearly abandoned the whole idea. I am glad I did not.
What I learned from that lopsided first attempt is that the mechanics of these cards are forgiving once you understand the logic. The fold does not care how experienced you are. It cares whether you scored accurately and burnished firmly. Once I understood that, every subsequent card improved noticeably.
The thing that keeps me coming back to fancy fold card ideas is the reaction they produce. I have watched people open panoramic accordion cards and genuinely gasp. That response is not something you get from a flat card, however beautifully it is decorated. The interactivity is the point. The fold is the message as much as the words inside.
My honest advice for anyone starting out: resist the urge to embellish heavily on your first few attempts. A clean, well-scored gatefold with a single focal image and a clear sentiment is more impressive than a cluttered card with a wonky fold. Master the mechanics first. The decoration follows naturally once the structure is solid.
I also made the classic mistake of over-gluing on my third or fourth card. I used a tape runner too close to the fold line on an accordion card and the panels would not open fully. The fix was to carefully slice the adhesive away with a craft knife, which worked but added unnecessary stress. Keeping adhesive well clear of fold lines is a rule I have never broken since.
The creative card folding styles available to crafters today are genuinely exciting. There has never been a better time to experiment, with tutorials, templates, and downloadable guides making even advanced folds accessible to motivated beginners.
— Rob
Craftsuprint has everything you need to start making fancy fold cards
Craftsuprint brings together downloadable templates, printable project kits, and craft supplies in one place, making it straightforward to move from inspiration to finished card.

The folded card section on Craftsuprint includes designs suited to a range of skill levels, from simple gatefolds to more involved multi-panel projects. If you want to try a new fold without sourcing materials from scratch, the free members gift is a practical starting point. Craftsuprint also stocks craft tools and supplies including the scoring tools, adhesives, and designer papers that every fancy fold project depends on. Browse the full range and find your next project today.
FAQ
What is a fancy fold card?
A fancy fold card is a handmade greeting card that uses non-traditional folding techniques, such as gatefold, accordion, or pop-up mechanisms, to create interactive designs beyond a standard centre fold. The term “fun fold card” is used interchangeably in the crafting community.
Are fancy fold cards difficult to make?
Many fancy fold designs are beginner-friendly because they rely on simple, repetitive scoring rather than complex cutting. The gatefold and Up Down Up fold are both excellent starting points for new crafters.
What size envelope fits a fancy fold card?
Most common fancy fold designs fit a standard envelope measuring approximately 5.5 inches by 4.25 inches when the card is folded to its closed position. Heavily embellished cards may require a larger or padded envelope.
Do fancy fold cards cost more to post?
They can. Multiple layers and embellishments often increase the thickness and weight of a finished card beyond standard postage limits, which may trigger a surcharge. Always weigh and measure the sealed envelope before posting.
What paper is best for fancy fold cards?
80lb or 90lb cardstock works best for the card base, as it holds its shape through multiple folds without buckling. A single 6x6 inch sheet of designer paper is sufficient for many fold styles, including the Wow Bow and accordion designs.