
Top card design trends for DIY crafters in 2026
Card making in 2026 is no longer just about sticking pretty paper together. It is about making a deliberate choice: which design speaks to the person receiving it, which technique feels achievable at your craft table, and which trend will still feel fresh six months from now rather than dated. With hundreds of designs swirling across craft marketplaces and social channels, knowing what to make is genuinely harder than knowing how to make it. This guide cuts through the noise, giving you a practical framework for evaluating trends, a detailed look at the year’s strongest ideas, and honest step-by-step guidance for the techniques worth your time.
Table of Contents
- How to spot a true trend: What matters for DIY card makers in 2026
- The must-try card design trends for 2026
- Hands-on exploration: Scene cards, watercolour and mechanism magic
- Trends at a glance: Quick comparison table
- Our take: Bridging authenticity and innovation in 2026
- Get inspired and craft your 2026 masterpiece
- Frequently asked questions
Key Takeaways
| Point | Details |
|---|---|
| Personalisation leads | Adding handwriting, custom illustrations, or names gives every card unique meaning. |
| Tactile impact | Textures like embossing and special papers set handmade cards apart in 2026. |
| Mix trends creatively | Blend modern techniques, eco-friendly materials, and playful elements for stand-out results. |
| Test mechanisms first | Always ensure interactive elements function smoothly before final decoration. |
How to spot a true trend: What matters for DIY card makers in 2026
With those challenges in mind, let’s set the ground rules for what makes a card trend worth your attention in 2026. Not every idea that appears on a mood board translates to a satisfying afternoon at the craft table. Before you invest in new supplies or download a new template, run each trend through four quick questions.
- Is it achievable at home? A trend that requires professional die-cutting machinery or commercial-grade foiling is exciting to admire but frustrating to replicate. Look for trends where the core technique is accessible with tools you already own or can reasonably source.
- Does it allow personalisation? The best card you can give someone has a piece of you in it. Whether that is a hand-lettered name, a sketch of a shared memory, or a colour palette chosen specifically for the recipient, personalisation transforms a nice card into a memorable one. Eco-friendly and personalisation trends are rising sharply, and both signal that recipients are craving something that feels made for them.
- Does it have tactile appeal? There is a growing body of evidence that physical texture makes a greeting card feel more premium and more emotionally significant. Sensory and tactile differentiation is a key through-line for 2026, pairing textures with bold visuals and structural depth. Embossing, layered papers, and raised lettering all reward the hand as well as the eye.
- Does it fit your ethical stance? More crafters are asking where their paper comes from and what happens to it after use. Sustainability is no longer a niche preference; it is a mainstream expectation. Looking at stationery design insights from across Europe, eco-conscious materials are consistently mentioned alongside design aesthetics as a purchase driver.
Pro Tip: You do not need a trend to tick all four boxes. Sometimes combining just two criteria, say tactile appeal and personalisation, is enough to produce a card that feels both current and genuinely special.
The must-try card design trends for 2026
With clear criteria in mind, here are the most inspiring card trends leading the way for 2026.
Script and hand-drawn revival
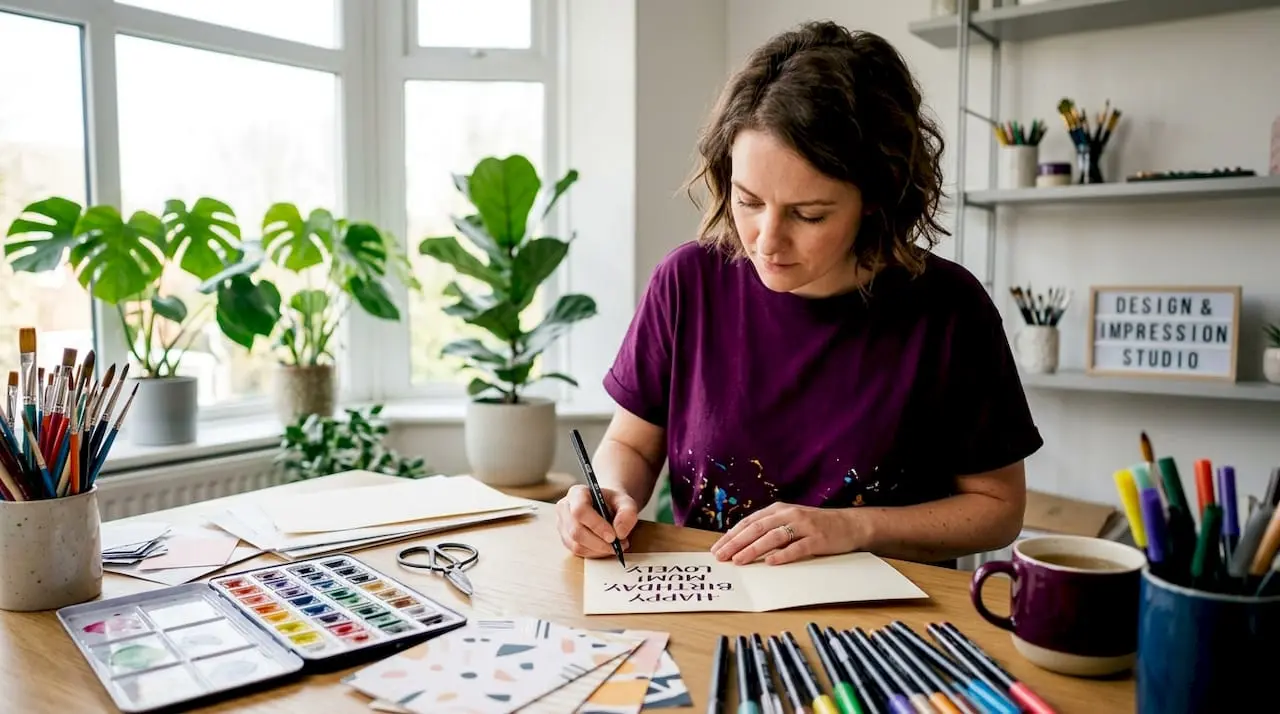
The mass-produced card market has long leaned on clean, digital-looking type. Crafters are pushing back. A handwritten revival is emerging in 2026, with script fonts that mimic natural handwriting and hand-drawn illustrations taking centre stage. For DIY makers, this is fantastic news because it is one of the most accessible trends imaginable. A fine-tipped brush pen, a Sakura Micron for linework, or even a biro can deliver this aesthetic. You do not need to be a trained calligrapher. Slightly wobbly letters, small ink blobs, and imperfect flourishes all contribute to the charm rather than detract from it. Think small illustrated borders featuring botanicals, tiny portraits of pets, or hand-lettered inside messages that reference a shared joke.
Tactile boldness: Geometric shapes and dimensional finishes
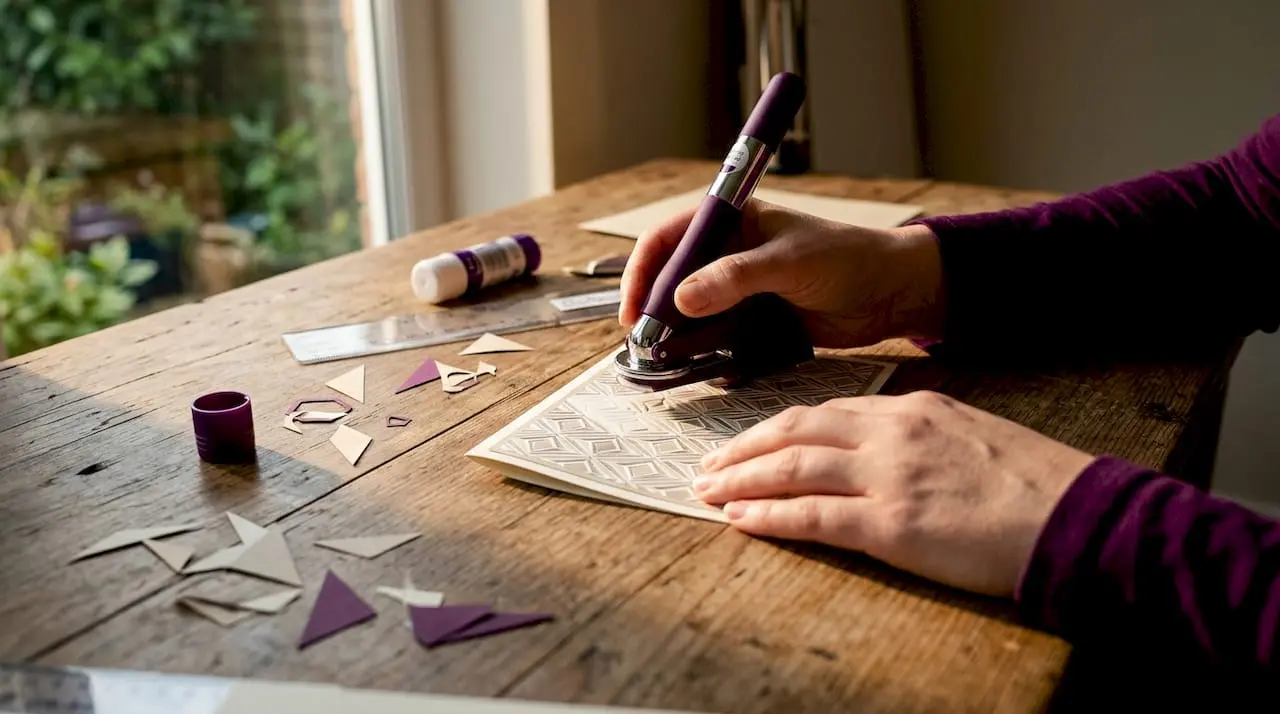
Bold geometric patterns paired with tactile finishes such as embossing and debossing are rising quickly. For DIY card makers, embossing folders run through a die-cutting machine are the most practical route. A single embossing folder can transform plain white cardstock into something that looks high-end within seconds. Debossing, where the pattern is pressed into rather than raised from the surface, gives a subtler, sophisticated result that works beautifully on kraft paper. If you do not own a machine, dry embossing with a stylus and brass stencil is a budget-friendly alternative that produces lovely results.
Quirky play: Mixed patterns, doodles, and hand lettering
This trend gives crafters explicit permission to break the rules. Mix a floral background with geometric lettering. Add hand-drawn arrows and stars around a printed photo. Layer a hand-lettered sentiment over a patterned panel. The guiding principle is that deliberate mismatching feels playful and modern rather than chaotic. Think of it as a designed aesthetic rather than an accident.
Minimalist and photo-forward cards
“Sometimes the most powerful card is the quietest one. A single photograph, a clean border, and three words in a simple font can move someone far more than a heavily decorated composition.”
Minimalist elegance and photo cards are gaining momentum, particularly for milestone occasions such as anniversaries, bereavements, and new arrivals. For the DIY maker, this means investing in good photo-quality inkjet paper and practising restraint. Resist the urge to add extra embellishments. The power is in the simplicity.
Interactive cards: Movement, sound, and light
LEDs, pull tabs, spinning mechanisms, and pop-up structures sit at the more ambitious end of the DIY spectrum, but they deliver an unmatched reaction from recipients. Interactive cards with sound or lights are increasingly popular in the commercial space, and clever hobbyists are adapting the ideas for handmade versions. Small LED tea light inserts, simple paper sliders, and Twist and Pop mechanisms are all achievable at home with patience and the right interactive card supplies.
Sustainability first: Recycled paper and clean inks
Personalisation and eco-friendly materials such as recycled paper and biodegradable inks are in higher demand than ever before. Switching to recycled cardstock does not mean sacrificing quality. Many recycled papers have beautiful natural textures that actually enhance hand-drawn and embossed styles. Look for FSC-certified stock and water-based inks when choosing your supplies. For eco-friendly card advice on sourcing sustainable materials, it is worth checking specialist blogs that focus on green crafting.
Pro Tip: Pair a handwritten personal letter on the inside with a tactile embossed cover for instant wow-factor. The combination costs little extra but elevates the card from lovely to genuinely memorable.
Hands-on exploration: Scene cards, watercolour and mechanism magic
Let’s roll up our sleeves and look at the step-by-step realities of making cards using the year’s hottest techniques.
Die-cut scene cards
Scene cards layer multiple elements to create depth, almost like a tiny stage set inside a card. The technique looks impressive but is manageable when approached systematically.
- Plan your layers. Die-cut scene cards work best when divided into foreground, midground, and background sections, with a limited palette of two to five colours and composition guided by the rule of thirds.
- Cut background first. Always work from back to front. Secure the background panel to your card base before adding midground elements.
- Raise each layer. Use foam adhesive pads or folded cardstock spacers to lift each layer off the one beneath it. Even 2mm of lift creates dramatic shadow and dimension.
- Add focal details last. Small punched flowers, tiny stamped figures, or hand-cut details go on at the very end when all structural layers are secure.
For DIY scene card tips on achieving depth with limited materials, working with a tight colour palette is repeatedly flagged as the single most effective shortcut.
Watercolour cards
Watercolour gives cards an organic, painterly quality that is almost impossible to replicate digitally. The key is understanding the paper.
- Choose 300gsm cold-pressed cotton paper. Cheaper papers buckle and resist pigment. Cotton paper accepts wet-on-wet techniques smoothly and dries without warping.
- Use masking fluid. Masking fluid preserves whites and allows you to layer freely without constantly painting around negative space. Apply it, let it dry fully, paint over everything, then rub it away to reveal crisp white areas.
- Layer wet-on-wet. Drop a second colour into a still-wet wash and let it bloom naturally. Do not fight the paint. The unexpected blends that appear are the hallmark of authentic watercolour work.
- Seal before assembling. Once dry, apply a light spray fixative to prevent smudging when the card is handled or posted.
Interactive mechanism cards
Twist and Pop structures and pull-tab reveals are the most beginner-friendly interactive options. Always assemble and test the structure before adding any decoration. Layer with contrasting cardstock to make the reveal visually clear. If you glue patterned papers over the mechanism before testing, misalignment becomes almost impossible to correct without damage.
Pro Tip: For interactive cards, rehearse the full motion of the mechanism at least three times before you glue anything permanently. It takes only a minute and saves enormous frustration.
Key tools for each style:
- Scene cards: Die-cutting machine, foam adhesive pads, bone folder, craft knife
- Watercolour cards: 300gsm cotton paper, masking fluid, quality brushes, spray fixative
- Interactive cards: Precision craft knife, bone folder, project templates, contrasting cardstock
Trends at a glance: Quick comparison table
Now that you’ve got the know-how, here’s a direct comparison to help you decide which trend to try first. Bold geometric shapes, special finishes, and sensory elements are the key differentiators in 2026, but every maker’s starting point is different.
| Trend | Difficulty | Key supplies needed | DIY time estimate | Wow factor |
|---|---|---|---|---|
| Hand-drawn/script | Beginner | Brush pens, fine liners | 20–40 minutes | High personal warmth |
| Geometric embossing | Beginner/Intermediate | Embossing folder, machine | 15–30 minutes | High tactile impact |
| Quirky mixed patterns | Beginner | Patterned papers, stamps | 30–45 minutes | Playful and bold |
| Minimalist/photo | Beginner | Photo paper, inkjet printer | 15–20 minutes | Elegant simplicity |
| Watercolour | Intermediate | Cotton paper, watercolours | 45–90 minutes | Artistic richness |
| Scene/die-cut layering | Intermediate/Advanced | Die cutter, foam pads | 60–120 minutes | Stunning depth |
| Interactive mechanism | Advanced | Craft knife, templates, patience | 90–150 minutes | Maximum delight |
How to decide which trend to try first:
- If you have under 30 minutes and basic supplies, start with hand-drawn or minimalist styles.
- If you want tactile impact with moderate investment, embossing is your best entry point.
- If you have an afternoon free and want to push your skills, attempt a watercolour or scene card.
- For a trend comparison that matches your current skill level and available tools, browsing curated template collections is a fast way to get oriented.
Ideally, try one tactile trend, one artistic trend, and one interactive project over the coming weeks. Spreading your experimentation avoids the trap of mastering one narrow technique while missing the broader creative toolkit that 2026 is offering.
Our take: Bridging authenticity and innovation in 2026
Most guides on card making trends ask you to choose a lane. Either you embrace the handmade, slightly imperfect, authentically personal approach, or you adopt structured, technically advanced techniques that produce polished results. We think that framing is unhelpful and honestly a little limiting.
The crafters producing the most talked-about cards in 2026 are not choosing between authentic and technical. They are doing both at once. A die-cut scene card with a hand-lettered greeting inside. A watercolour wash background with a precisely punched geometric frame. An interactive pop-up reveal covered with hand-drawn botanical details. Personal touches as the visual hook and disciplined techniques for lasting impact is precisely the combination that makes a card worth keeping.
The uncomfortable truth is that many crafters avoid mixing approaches because they fear the result will look confused or unfinished. In reality, the tension between those two impulses is where the most interesting work lives. Your slightly uneven brush lettering over a mathematically precise embossed grid is not a mistake. It is the signature that makes the card uniquely yours.
Start small. One new technique per card. A single interactive element. One textured panel alongside a hand-drawn border. Build your skills incrementally and you will naturally develop a personal style that draws from multiple trends without feeling derivative. The goal is not to replicate what you see in a trend forecast. The goal is to make something that surprises and delights a specific person sitting somewhere waiting for the post to arrive.
Get inspired and craft your 2026 masterpiece
If you’re ready to experiment or need a little extra nudge, here’s where to start your next creative adventure.
Knowing a trend and having the right starting materials are two very different things. Translating the ideas in this article into finished cards is much faster when you have access to well-designed templates, coordinated kits, and tutorials built around the exact techniques covered here.
At Craftsuprint, you will find an extensive library of card making downloads and tutorials that map directly onto 2026’s leading trends, from hand-drawn botanical kits to layered scene card templates and interactive structure guides. Whether you are a seasoned crafter looking for fresh inspiration or a beginner wanting a reliable starting point, the marketplace brings together independent designers and ready-to-print resources that make your next project feel achievable from the very first click. Browse the weekly freebies, join the community, and let your 2026 card making begin in earnest.
Frequently asked questions
What is the most accessible card design trend for beginners in 2026?
Handwritten and hand-drawn styles are leading trends for 2026 and require only basic supplies such as brush pens and fine liners, making them ideal for crafters just starting out.
How can I make my DIY cards feel more professional this year?
Incorporate tactile finishes such as embossing or debossing alongside bold visual elements, as tactile richness with special finishes is a defining quality of premium cards in 2026.
Which eco-friendly materials are popular in 2026 card making?
Recycled paper and biodegradable inks are the top choices, with demand for recycled paper and sustainable inks rising steadily among both crafters and recipients.
What’s essential when trying interactive mechanisms?
Always test the mechanism fully before decorating, as structure and alignment must work perfectly before any patterned papers or embellishments are added.
How do I combine multiple trends in one card?
Start with one dominant style as your foundation, then layer in accents from a second trend, such as pairing a minimalist photo layout with an embossed border, or adding hand-drawn doodles to a geometric background panel.