
Essential craft supplies checklist: what every crafter needs
TL;DR:
- A craft supplies checklist should prioritize core tools like scissors, cutting mats, and craft knives, along with matched adhesives for specific materials. Buying only what is needed for initial projects helps prevent waste and ensures long-term motivation. Using quality mid-range tools and free tutorials improves results and keeps crafting enjoyable.
An essential craft supplies checklist is the foundation of every successful crafting project, giving you the right tools and materials before you cut, stick, or paint a single piece. Whether you are picking up a craft knife for the first time or restocking a well-used workbench, the same core principles apply: buy the right tools first, match your materials to your project, and resist the urge to fill a basket with supplies you have not yet earned. This guide covers must-have art materials, the logic behind each purchase, and the mistakes that turn craft rooms into expensive storage units.
1. The essential craft supplies checklist: core cutting tools
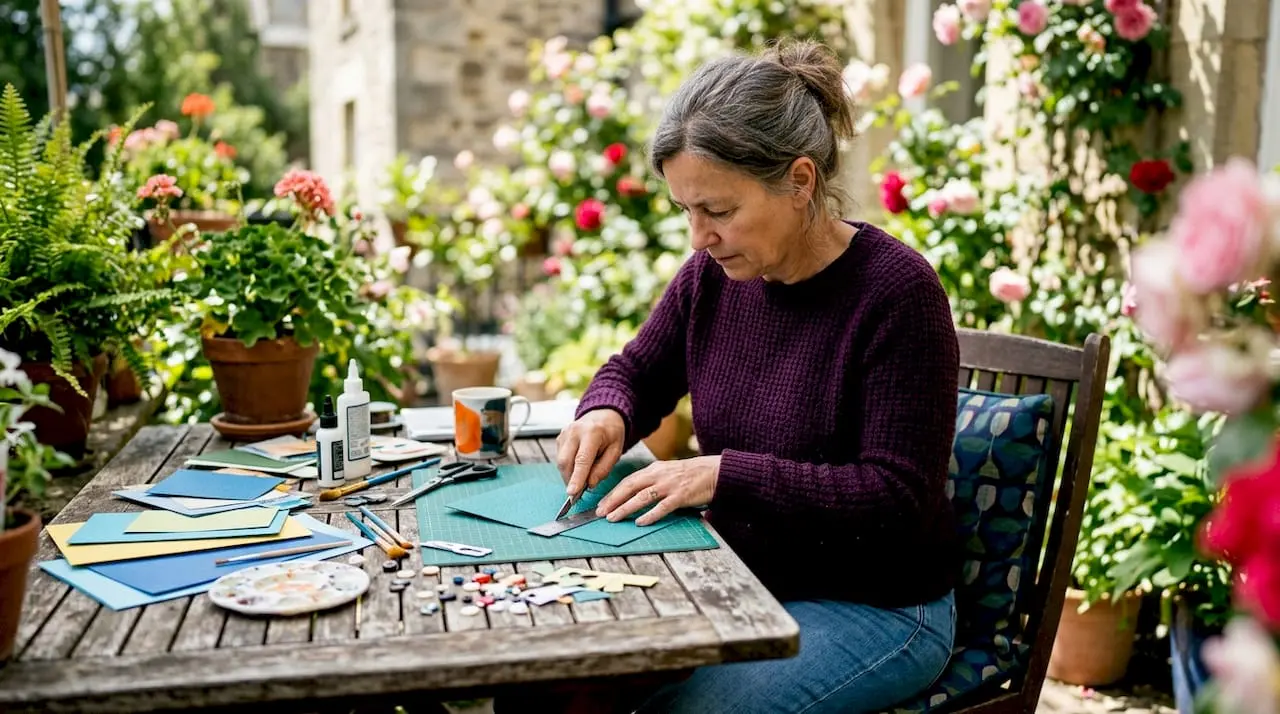
Core cutting tools form the backbone of almost every craft project, from card making to paper sculpture. The universally accepted starting point includes a sharp pair of scissors, a self-healing cutting mat, a metal-edge ruler, and a craft knife with replacement blades. These four items alone will cover the majority of tasks a new crafter encounters.
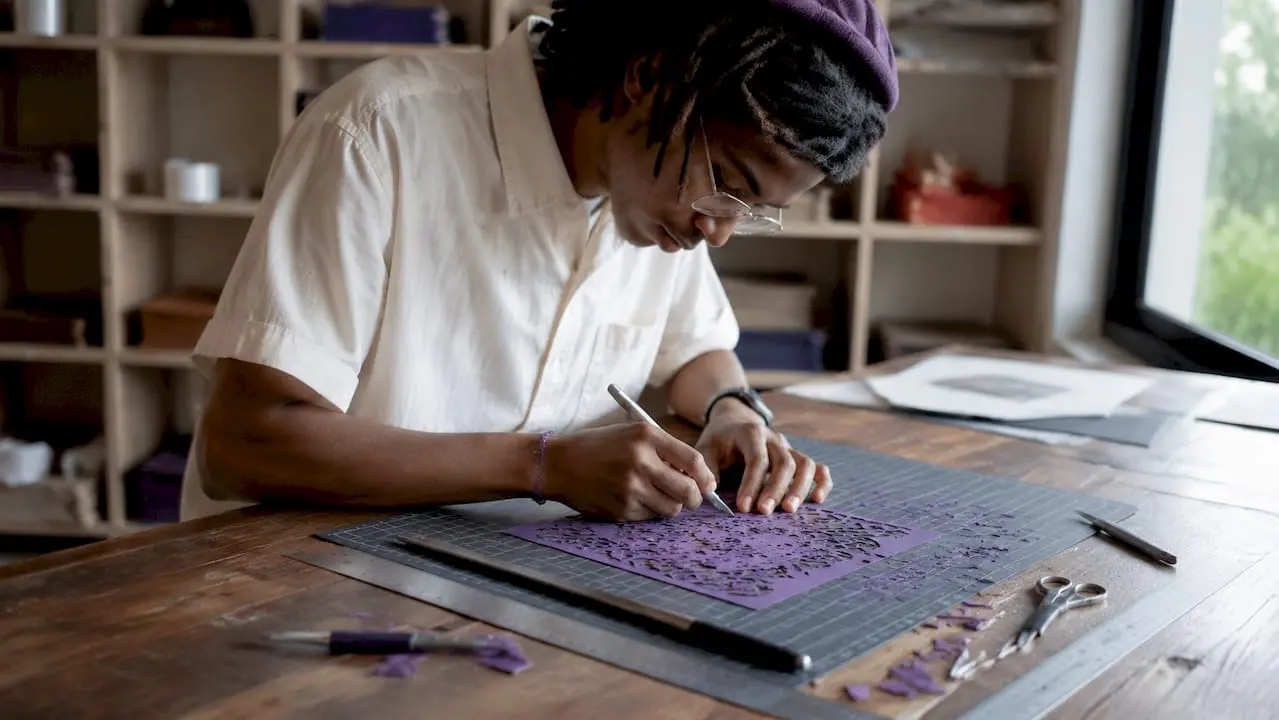
A craft knife, particularly an X-Acto style blade, is non-negotiable for precision work. Dull blades cause tearing rather than clean cuts, which ruins fine detail work and wastes materials. Keeping a stock of replacement blades is not optional; it is the single most cost-effective habit a crafter can build.
Self-healing cutting mats and metal rulers are foundational for accurate, repeatable cuts. A self-healing mat protects your work surface and keeps the mat flat over hundreds of uses. A metal ruler, unlike a plastic one, will not be nicked by a blade mid-cut, which means your straight lines stay straight.
Pro Tip: Invest in mid-range quality for your cutting tools. A cheap pair of scissors loses its edge within weeks and makes every cut a frustration. Brands like Fiskars offer reliable performance without a premium price tag.
- Sharp fabric or craft scissors (dedicated, not shared with the kitchen)
- X-Acto style craft knife with a pack of spare blades
- Self-healing cutting mat, A3 size as a minimum
- Metal-edge ruler, 30 cm or 45 cm depending on your project scale
2. Essential adhesives and their best use cases
Adhesive choice is where many crafters go wrong, and the consequences range from peeling card to permanently ruined fabric. Choosing adhesives by material type is the correct approach: PVA glue for paper and card, hot glue for heavier or structural bonds, and fabric glue for flexible textile work.
“The right adhesive for the right material is not a preference. It is the difference between a project that lasts and one that falls apart on the table.” — Baykidsmuseum Arts & Crafts Tools Guide
Each adhesive type has a distinct role in your crafting essentials list. Glue sticks produce clean, low-mess bonds that suit lightweight paper but will not hold under stress. Hot glue guns bond quickly and strongly, making them ideal for three-dimensional projects, floral arrangements, and mixed-media work. Epoxy adhesive creates a permanent bond on non-porous surfaces like metal and glass, which makes it the right choice for jewellery making or fixing embellishments to hard surfaces.
- PVA glue: Best for paper, card, and decoupage. Dries clear and flexible. Slow setting, which allows repositioning.
- Glue stick: Clean and quick for lightweight paper. Weaker bond, not suited to heavy card or mixed materials.
- Hot glue gun: Fast and strong. Ideal for structural or three-dimensional work. Can warp thin paper if applied too heavily.
- Fabric glue: Flexible when dry. Designed for textiles and will not crack with movement.
- Epoxy: Two-part adhesive for permanent bonds on metal, glass, or ceramics. Not reversible.
Tacky glue sits between PVA and hot glue in terms of strength. It grabs faster than PVA and works well for heavier embellishments on card and paper projects. Stocking PVA, a glue stick, a hot glue gun, and tacky glue covers the vast majority of crafting scenarios without overcomplicating your supply kit.
3. How to choose papers, paints, and embellishments wisely
Consumable materials are where craft budgets spiral fastest. Paper, cardstock, acrylic paints, watercolours, washi tape, sequins, and ribbon are all easy to accumulate and difficult to use up before they degrade or go out of fashion. The practical rule is to buy materials for one or two projects rather than stocking up speculatively.
Cardstock weight matters more than most beginners realise. A 160 gsm to 300 gsm card is the standard range for handmade cards and paper crafts. Lighter paper suits backgrounds and layering; heavier card suits bases and structural elements. Buying a mixed-weight pack initially lets you discover your preference before committing to bulk quantities.
Acrylic paints are the most versatile option for new crafters because they dry quickly, clean up with water, and work on paper, canvas, wood, and fabric. Watercolours require more technique to control but produce effects that acrylics cannot replicate. Start with a small set of primary colours in either medium and mix your own shades rather than buying every colour individually.
Pro Tip: Before buying any new materials, search for free tutorials on YouTube or visit Craftsuprint’s project library to see exactly which supplies a project requires. This prevents buying materials that sit unused.
Decorative items like washi tape, sequins, and die-cut embellishments are the most tempting and the least urgent purchases. They add finishing detail but cannot rescue a project built on poor technique or wrong materials. Buy embellishments after you have completed your first few projects and know what your style actually is.
4. What supplies do I need for crafts? Matching tools to your project type
Project-specific needs dictate supplies far more than any generic checklist can capture. A card maker needs a stamping platform, ink pads, and die-cutting tools. A decorative painter needs quality brushes, gesso, and a palette. A paper crafter working digitally needs a printer, quality paper, and a bone folder. These are not interchangeable.
The table below maps common project types to their priority supplies, which helps you focus your first purchases rather than buying a generic kit that covers everything poorly.
| Project type | Priority supplies |
|---|---|
| Card making | Scissors, bone folder, adhesive, cardstock, stamps, ink pads |
| Paper crafts | Cutting mat, craft knife, ruler, PVA glue, mixed-weight paper |
| Decorative painting | Acrylic or watercolour paints, quality brushes, palette, gesso |
| Scrapbooking | Adhesive, cardstock, photos, embellishments, washi tape |
| Textile crafts | Fabric scissors, fabric glue, needle and thread, iron-on interfacing |
| Mixed media | Hot glue gun, acrylic paints, collage papers, epoxy, embellishments |
Buying all supplies at once can push costs beyond £400 and leaves you with materials you may never use. The phased approach, starting with one project type and expanding as your skills and interests develop, is the method that experienced crafters consistently recommend.
Before adding anything new to your basket, ask yourself these questions:
- Do I have a specific project in mind that needs this item?
- Do I already own something that could do the same job?
- Have I used up or worn out my current version of this tool?
- Am I buying this because I need it or because it looks appealing?
Aspirational purchases are the leading cause of unused craft supplies. Quality materials only improve results when you have the skill and the project to use them correctly.
5. How to avoid cheap tools that kill your motivation
Mid-range tools offer the best balance of performance and value for crafters at every level. Dollar-store or pound-shop scissors, rulers, and adhesives consistently underperform and create frustration that discourages continued crafting. Poor ergonomics in cutting tools cause hand fatigue. Weak adhesives fail mid-project. Thin cutting mats warp and slide.
The distinction between cheap and expensive is not always obvious on a shelf. A Fiskars scissors costs more than an unbranded equivalent but will hold its edge for years with basic care. An X-Acto knife with a comfortable grip reduces the hand strain that makes detailed cutting feel laborious. These are not luxury upgrades; they are tools that make the craft enjoyable rather than a chore.
Blade maintenance is a habit that separates crafters who get clean results from those who do not. A dull blade drags and tears rather than slicing cleanly, which affects every cut regardless of how steady your hand is. Replace blades regularly, store cutting tools with blade guards on, and keep scissors away from non-craft uses like opening packaging.
Pro Tip: Build your toolkit in three stages: cutting tools first, adhesives second, consumable materials third. This order matches the sequence in which most projects are actually made.
6. Organising your craft supplies to keep them usable
Organisation is not a secondary concern. Supplies that are buried, tangled, or stored incorrectly degrade faster and take longer to find, which reduces the time you actually spend crafting. A simple system beats an elaborate one every time.
Clear stackable boxes with lids are the most practical storage solution for most crafters. Label each box by category: cutting tools, adhesives, paper, embellishments. Keep your most-used items at desk height and archive seasonal or project-specific materials elsewhere. This single habit prevents the “craft graveyard” effect where supplies accumulate without being used.
Paper and cardstock need flat, dry storage to prevent warping and moisture damage. A flat-file drawer or a large portfolio case keeps sheets in usable condition far longer than a pile on a shelf. Paints should be stored upright with lids tightly closed to prevent skinning. Washi tape and ribbon store neatly on a dowel rod or a dedicated dispenser, which also makes them visible and therefore more likely to be used.
Digital crafters face a different organisation challenge. Downloadable files from platforms like Craftsuprint accumulate quickly and need a clear folder structure on your computer or cloud storage. Organise by project type, then by designer or theme, so you can find what you need without scrolling through hundreds of files.
7. Building your crafting essentials list on a budget
Starting with student-grade materials is the correct approach for new crafters. Student-grade paints and papers cost less and perform well enough to learn techniques without wasting money on professional materials you are not yet equipped to use fully. As your skills develop, you can upgrade specific items rather than replacing everything at once.
Free online tutorials have replaced the need for physical craft books for most learners. YouTube channels, Craftsuprint’s tutorial library, and community forums provide technique guidance at no cost. Redirecting that book budget toward a better pair of scissors or a quality cutting mat produces a more lasting benefit.
A realistic starter budget covers the core cutting toolkit, two or three adhesives, and materials for one defined project. This approach tests your interest in a specific craft before you invest further. Crafters who follow a phased acquisition model consistently report less wasted spending and more satisfaction with their results.
The craft supplies guide on Craftsuprint is a useful reference for matching specific tools to project types and finding current recommendations across categories. Cross-referencing a checklist like this one with a project-specific guide prevents both under-buying and over-buying.
Key takeaways
A well-built craft supplies checklist prioritises core cutting tools, matched adhesives, and project-specific materials over generic bulk buying.
| Point | Details |
|---|---|
| Start with cutting tools | Scissors, a self-healing mat, a metal ruler, and a craft knife cover most projects. |
| Match adhesive to material | PVA for paper, hot glue for structure, fabric glue for textiles prevents project failure. |
| Buy for one project at a time | Phased buying tests your interest and prevents unused supplies from accumulating. |
| Choose mid-range quality | Cheap tools underperform and reduce motivation; mid-range brands like Fiskars offer lasting value. |
| Use free tutorials before buying | Online resources show exactly which supplies a project needs before you spend anything. |
What I have learned from years of building a craft supply collection
The most common mistake I see is buying supplies for the crafter you want to be rather than the crafter you are right now. A full set of professional-grade watercolours is wasted on someone who has not yet learned wet-on-wet technique. A die-cutting machine is a poor first purchase if you have not yet worked out whether card making is actually the craft you enjoy most.
My honest advice is to complete at least three projects in a craft before buying anything beyond the basics. By the third project, you know which tools you reach for constantly and which ones you have not touched. That knowledge is worth more than any shopping list.
Quality matters most in the tools you use every single session. Scissors, your cutting mat, and your primary adhesive are worth spending more on. Embellishments, decorative papers, and seasonal materials are worth spending less on, because your taste will change as your skills develop.
I also recommend a quarterly inventory check. Pull everything out, discard dried adhesives and degraded materials, and note what you have actually used. This prevents the slow accumulation of supplies that never get touched and keeps your workspace functional rather than cluttered.
The crafters I know who get the most enjoyment from the hobby are not the ones with the most supplies. They are the ones who know exactly what they have, where it is, and what they plan to make with it next.
— Rob
Where to find quality craft supplies and resources
Craftsuprint brings together craft supplies, downloadable project files, and tutorials in one place, which makes it a practical starting point for building your checklist.

The craft supplies classifieds on Craftsuprint list tools and materials across categories, from cutting equipment to decoration materials, so you can source specific items without searching across multiple retailers. New crafters can also claim a free members gift to get started with downloadable project resources at no cost. With independent designers listing new products regularly, the range covers everything from card making kits to paper craft templates, giving you project-ready materials that align directly with the supplies on your checklist.
FAQ
What goes on a basic craft supplies checklist?
A basic craft supplies checklist includes scissors, a self-healing cutting mat, a metal ruler, a craft knife with spare blades, PVA glue, a glue stick, and cardstock. These tools cover the majority of paper and card-based projects.
How much should a beginner spend on craft supplies?
A focused starter kit covering cutting tools and adhesives for one or two projects costs significantly less than buying a full supply range at once, which can exceed £400. Start small and add supplies as your skills and project focus become clear.
What is the best adhesive for paper crafts?
PVA glue is the best adhesive for paper crafts because it dries clear, bonds reliably, and allows repositioning before it sets. Glue sticks work for lightweight paper but are not strong enough for heavier cardstock.
Do I need different supplies for different crafts?
Card makers need stamping platforms and ink pads; decorative painters need brushes and gesso; textile crafters need fabric scissors and fabric glue. Project-specific tools always outperform generic kits for quality and value.
Where can I find free tutorials to guide my supply choices?
Craftsuprint’s craft ideas library and YouTube both offer free tutorials that show exactly which supplies each project requires before you buy anything.