
Digital craft project guide for beginners: step-by-step
TL;DR:
- Digital craft projects transform downloadable files into tangible items like cards, ornaments, or decor without needing advanced skills or expensive equipment. Beginners can start easily with free software, standard printers, and simple materials, following a straightforward workflow that includes downloading, preparing, cutting or printing, and assembling. Using properly chosen file formats like SVG or PDF and organizing files systematically helps avoid common mistakes and speeds up the crafting process.
A digital craft project takes a downloadable design file — SVG, PDF, PNG or similar — and turns it into something you can hold, gift, or hang on a wall. You do not need to be a designer or own expensive equipment to get started. Beginners do not need to be an artist or tech wizard; basic tools and a willingness to learn are genuinely sufficient.
Here is the fastest way to begin right now:
- Download a file. Grab a free or low-cost printable from Craftsuprint — a UK-focused marketplace with ready-to-use downloads priced in pounds.
- Open it in free software. Canva or Inkscape handle most beginner files without any cost.
- Print or cut. Send a PDF or PNG to your home printer, or load an SVG into Cricut Design Space or Silhouette Studio and let a cutting machine do the work.
- Assemble and finish. Fold, glue, score, or layer — most beginner projects take under an hour from download to done.
Common file types you will encounter: SVG (scalable vector, ideal for cutting machines), PDF (print-ready pages), PNG (raster images for printing), JPG (photos and backgrounds), and DXF (an older vector format some machines still prefer). The sections below walk through each format, the tools you need, and six beginner projects with step-by-step instructions.
Table of Contents
- What are the different digital craft file types?
- Which tools and materials do you actually need to start?
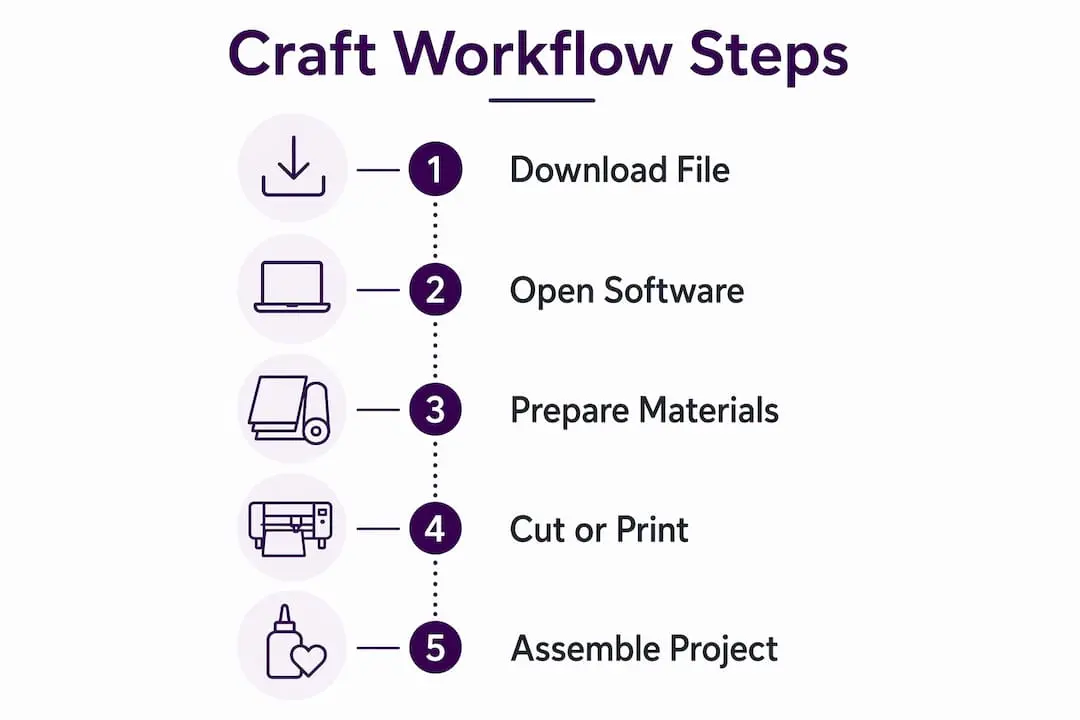
- How does the step-by-step digital craft workflow actually work?
- What are the best beginner digital craft projects to try first?
- Where can you find digital craft files in the UK?
- How do you build a digital craft library that actually saves you time?
- What goes wrong for beginners, and how do you fix it fast?
- What does a beginner digital craft project actually cost in the UK?
- Key takeaways
- Why finishing one project changes everything
- Ready to make your first project with Craftsuprint?
- Useful sources
- FAQ
What are the different digital craft file types?
Choosing the wrong file type is the single most common beginner mistake. Each format has a specific job, and knowing which to reach for saves wasted cuts and misprints.
| File type | Best for | Compatible free tools | Compatible machine software | Common pitfall |
|---|---|---|---|---|
| SVG | Vector cutting, layered designs | Inkscape, Canva | Cricut Design Space, Silhouette Studio | Rasterised SVGs won’t scale cleanly |
| DXF | Legacy vector cutting | Inkscape | Silhouette Studio (preferred), some Cricut | Layers often lost on import |
| PNG | Print projects, digital stamps | Canva, any image viewer | Cricut (print-then-cut), Silhouette | Resolution below 300 DPI looks blurry |
| JPG | Backgrounds, photo-based prints | Canva, any image viewer | Cricut (print-then-cut) | No transparency channel |
| Multi-page printables, kits | Adobe Reader, Canva | Not for cutting — print only | Locked layers can’t be edited |
A few things worth knowing before you download anything:
- SVG is the gold standard for cutting machines. It stores paths as maths, so it scales to any size without losing quality. Cricut Design Space and Silhouette Studio both import SVGs natively.
- DXF is older and sometimes loses layer information on import. Use it only when an SVG version is unavailable.
- PNG and JPG are raster formats — they are made of pixels, not paths. They print beautifully at 300 DPI or above, but they cannot be sent to a cutting machine for a clean vector cut. Cricut’s print-then-cut feature is the exception: it prints the image first, then cuts around it.
- PDF is the easiest format for pure printables. Open it in Adobe Reader, hit print, and you are done. You cannot easily edit a locked PDF, so check before you buy whether the seller provides an editable version.
Pro Tip: If an SVG opens in your browser as a flat image rather than a layered file, it has been exported as a rasterised SVG. Contact the seller or open it in Inkscape to check — a true vector SVG will show individual paths in the XML editor.
Which tools and materials do you actually need to start?
You do not need to spend hundreds of pounds before your first project. Most beginners start with what they already own and add machines later.
Software: free first, paid when you need it
Inkscape is free, open-source, and handles SVG and DXF files with full layer support. It has a steeper learning curve than Canva but gives you genuine vector editing power. Canva is browser-based, free for most features, and brilliant for PNG and PDF printables — drag, resize, download, print.
Cricut Design Space is free to download and required if you own a Cricut Maker or Cricut Explore machine. It imports SVG and PNG files and manages cut settings automatically for hundreds of materials. Silhouette Studio is the equivalent for Silhouette Cameo owners; the free version handles SVG and DXF, while the paid Designer Edition unlocks more import options.
Adobe Illustrator is the professional standard for vector design. At roughly £25 per month on a Creative Cloud subscription, it is not a beginner necessity, but it becomes worthwhile once you start creating your own files rather than just using downloads. Professional illustrators often work at 1.5–2× the final print size to preserve detail and keep edges clean — a habit worth picking up early.
Hardware and consumables
- Home inkjet or laser printer — most beginners already own one. For card making, a laser printer gives sharper text; an inkjet handles photographic gradients better.
- Entry-level cutting machine — the Cricut Explore 3 and Silhouette Cameo 4 are the two most popular choices in the UK. Both cut cardstock, vinyl, and iron-on material.
- Cutting mat — comes with most machines; replace when it loses grip (roughly every 25–40 uses depending on material).
- Craft knife and self-healing mat — for hand-trimming and scoring.
- Cardstock — 160–200 gsm for greeting cards, 80–100 gsm for layered inserts. Heavier stock (250–300 gsm) for box bases and 3D builds.
- Vinyl — permanent adhesive vinyl for labels and decals; removable vinyl for stencils.
- Adhesives — PVA glue for paper, double-sided tape for clean joins, foam pads for raised 3D layers.
For speciality papers, the paper collection at Noirci Studio covers textured and coated stocks that lift layered projects considerably. You can also browse craft supplies classifieds on Craftsuprint for UK sellers offering materials at competitive prices.
How does the step-by-step digital craft workflow actually work?
This seven-step process applies to almost every project, whether you are printing a card or cutting a layered ornament.
- Find and licence a file. Search Craftsuprint or another trusted source. Check the licence before you buy: personal use only, or does it allow small-business sales? Keep the receipt.
- Download and store correctly. Save the ZIP or file to a dedicated folder — not your general Downloads folder. Unzip immediately and rename the file descriptively (e.g.
Christmas_Star_Ornament_SVG_v1). - Open and prepare in software. Load the SVG into Inkscape or Cricut Design Space, or the PDF into Canva. Check that all layers are present and that colours are correct.
- Resize and arrange. Scale to your intended finished size. Working at 1.5–2× the final print size during preparation preserves detail for print outputs. For cutting projects, arrange pieces to minimise material waste.
- Test print or test cut. Print a small section on plain paper, or run a test cut on a scrap of your chosen material. This single step saves more wasted cardstock than any other habit.
- Final cut or print. Once the test looks right, run the full project. For cutting machines, set blade depth and pressure according to your material — Cricut Design Space and Silhouette Studio both have material presets.
- Assemble and finish. Score fold lines with a bone folder before folding. Use foam pads to raise layers. Add embellishments, ribbon, or a sentiment stamp to finish.
Pro Tip: Before committing a full sheet of premium cardstock, cut a 5 cm test square with the same blade and pressure settings. If the blade drags or tears, increase pressure by one step and test again. A 30-second test saves an entire sheet.
A printable craft workflow guide on Craftsuprint walks through this process with timed estimates if you want a visual reference alongside this guide.
What are the best beginner digital craft projects to try first?
Digital craft examples range from simple 2D printables through layered paper art to tech-integrated builds such as LED-matrix clocks. Start at the easy end and work up.
Printable greeting card
Difficulty: Beginner | Time: 20–30 minutes | Materials: A4 cardstock (200 gsm), home printer, bone folder, scissors or trimmer
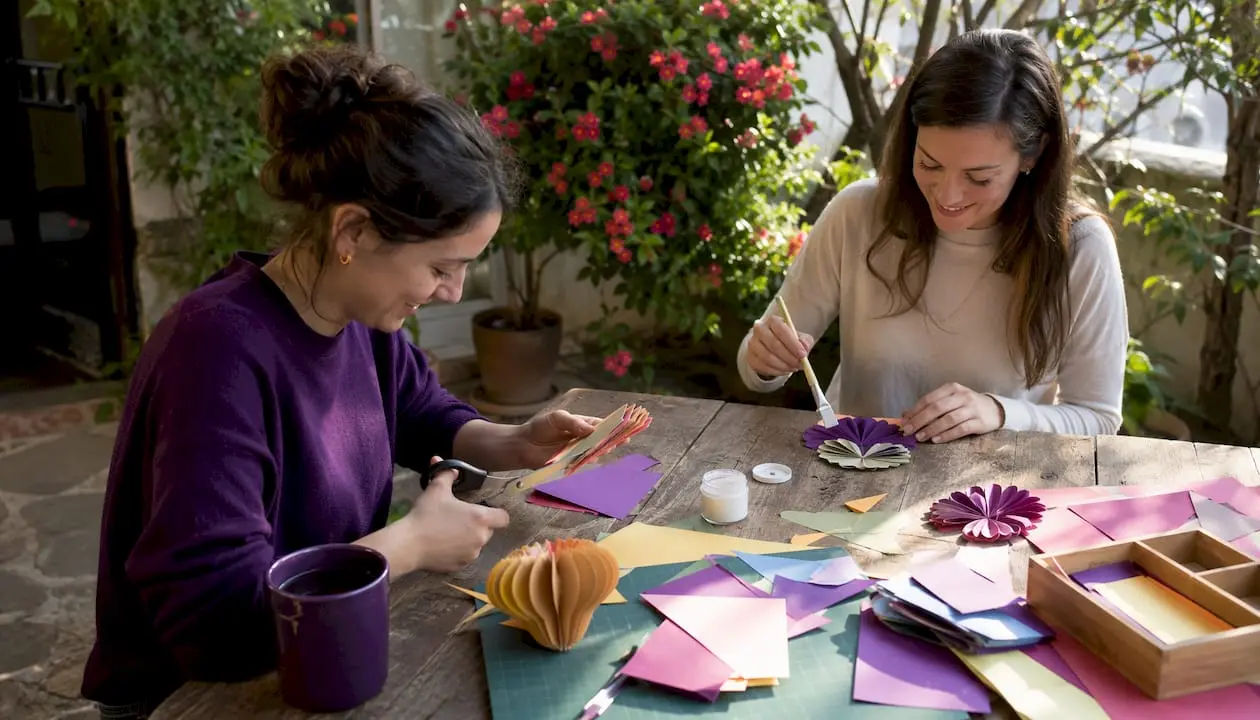
Download a PDF card kit from Craftsuprint, print on cardstock, score the fold line with a bone folder, and fold. That is genuinely it for a flat card. Add a printed insert for a personal message. This is the ideal first project because the only variable is your printer settings.
Gift tags (set of 6)
Difficulty: Beginner | Time: 15–20 minutes | Materials: 160 gsm cardstock, printer or cutting machine, hole punch, twine
A PNG or PDF gift tag sheet prints on a single A4 page. Cut by hand or load the SVG version into Cricut Design Space for machine cutting. Punch a hole, thread twine, and done. A set of six takes less time than a trip to the shops.
Layered paper ornament (simple 3D)
Difficulty: Easy-intermediate | Time: 45–60 minutes | Materials: Three colours of 160 gsm cardstock, cutting machine, foam pads, glue
This is where SVG files earn their keep. A layered ornament SVG contains separate paths for each colour layer. Load it into Cricut Design Space or Silhouette Studio, assign each layer to a different cardstock colour, cut, and stack with foam pads between layers. The result looks far more complex than the effort involved.
Faux-leather key charm
Difficulty: Easy-intermediate | Time: 30–45 minutes | Materials: Faux leather sheet, cutting machine, key ring, hole punch
A real-world Cricut faux-leather charm project documents the exact machine settings, mat choice (StandardGrip), and blade depth needed. Download an SVG charm template, load faux leather onto the mat, cut, punch a hole, and attach a key ring. The finished piece looks handmade in the best sense.
Basic LED pixel clock (tech project)
Difficulty: Intermediate | Time: 3–5 hours | Materials: NeoPixel LED grid, ESP8266 microcontroller, 3D-printed or laser-cut diffuser
This is the step up from paper. A NeoPixel/ESP8266 clock build combines a hardware assembly with a web interface for live tuning. It requires basic soldering and some comfort with code, so treat it as a goal rather than a first project. The pixel-art LED matrix clock with a 3D-printed diffuser is a similar build with excellent documentation.
Printable paper craft kit (Craftsuprint starter)
Difficulty: Beginner | Time: 30–45 minutes | Materials: Cardstock, printer, scissors, glue
Browse the digital paper crafts guide on Craftsuprint for curated starter kits. Many include a card front, insert, and envelope template in one PDF download — everything you need in a single file.
Where can you find digital craft files in the UK?
Finding files is easy. Finding files with clear licences and UK-relevant pricing is where beginners often get caught out.
Craftsuprint is the primary recommendation for UK crafters. Prices are listed in pounds, VAT is handled correctly for UK buyers, and the catalogue skews heavily towards card making, paper crafts, and printable kits — exactly what most beginners want. The Gold Star programme rewards designers and gives buyers access to community features including weekly freebies.
Before downloading anything from any source, run through this licence checklist:
- Personal vs commercial use. A personal-use licence means you can make the finished item for yourself or as a gift. It does not allow you to sell finished items at a craft fair or online shop.
- Attribution requirements. Some free files require you to credit the designer. Check the terms before sharing photos of your finished project.
- Modification rights. Can you resize, recolour, or combine the file with other designs? Many licences prohibit redistribution of modified files.
- Resolution and size limits. Some licences specify a maximum print size. Printing a 10 cm design at A2 size may breach the terms even if the file technically scales.
Pro Tip: Save a copy of the licence terms alongside the file in your project folder. If you ever sell finished items and a question arises, having the original licence document on hand resolves it immediately.
Safety basics for downloads: scan ZIP files with Windows Defender or Malwarebytes before opening, download only from established sellers with visible review histories, and keep purchase receipts in a dedicated email folder.
How do you build a digital craft library that actually saves you time?
An organised digital library is as crucial as a tidy physical craft room — the difference between spending your time making and losing an hour scrolling through a chaotic Downloads folder.
Start with this folder structure:
- Digital Craft Library
- Patterns (SVG, DXF files by theme)
- Design files (working files, layered PSDs or Inkscape SVGs)
- Inspiration (screenshots, mood images)
- Projects in progress (one subfolder per active project)
- Completed (archived finished project files)
Naming conventions matter more than folder depth. A file called image(1).png is useless in six months. Rename everything on download: Floral_Gift_Tag_SVG_200gsm_v1 tells you the theme, format, recommended material, and version at a glance.
Create a dedicated landing zone folder — name it !Downloads so it sorts to the top of your file browser. Every new purchase lands here first. Once a week, during a short “creative reset,” move files into the main library, rename them, and add tags. On Windows, use the Tags property in file details. On Mac, use the built-in colour-tag system. A tag like #QuickProject or #Seasonal_Spring lets you pull relevant files across all folders instantly.
Pro Tip: Inside each project folder, drop a plain text file called _README.txt. Note the source, purchase date, licence type, materials needed, and a link to any tutorial. Future-you will be grateful every single time.
What goes wrong for beginners, and how do you fix it fast?
Most beginner problems fall into three categories: the machine won’t cut through, the print doesn’t align, or the SVG won’t import correctly.
The cut isn’t going through
- Check blade depth — most machines use a numbered dial; increase by one step and test-cut a scrap.
- Check mat grip. A worn mat lets material shift mid-cut, causing incomplete cuts. Replace or re-sticky with a brayer.
- Check material thickness. Cricut Design Space and Silhouette Studio both have material presets; selecting the wrong one (e.g. “thin cardstock” for 200 gsm stock) under-powers the cut.
Print alignment is off
- For print-then-cut projects, calibrate your machine using the built-in calibration tool in Cricut Design Space or Silhouette Studio.
- Print at 100% scale — never “fit to page.” Scaling even 1% throws registration marks off enough to cause misalignment.
- Use the same printer every time for a given project. Different printers scale output slightly differently.
SVG won’t import correctly
- Open the file in Inkscape first. If it shows as a single flat image rather than separate paths, it is a rasterised SVG. You cannot cut it as a vector.
- Check for missing fonts. If the SVG contains text, the font must be installed on your computer or converted to paths before export.
- DXF files sometimes import with incorrect units. In Silhouette Studio, check the document units match the file’s intended size before cutting.
Pro Tip: Clean your cutting blade with a ball of aluminium foil every 10–15 uses. Roll the blade tip through the foil 20–30 times to remove adhesive residue. It costs nothing and extends blade life significantly.
For more finishing and troubleshooting techniques, the paper crafting tips guide on Craftsuprint covers common issues with layered card assembly and print finishing.
What does a beginner digital craft project actually cost in the UK?
Here is a realistic breakdown for the projects covered above, materials only, at UK prices.
| Project | Materials cost (approx.) | Time estimate | Difficulty |
|---|---|---|---|
| Printable greeting card | — | 20–30 min | Beginner |
| Gift tags (set of 6) | — | 15–20 min | Beginner |
| Layered paper ornament | — | 45–60 min | Easy-intermediate |
| Faux-leather key charm | — | 30–45 min | Easy-intermediate |
| LED pixel clock | £25–£60 (hardware) | 3–5 hours | Intermediate |
File costs are separate: most Craftsuprint downloads cost £1–£3, and the platform offers weekly freebies. A cutting machine is the largest single investment — entry-level Cricut Explore 3 and Silhouette Cameo 4 both retail around £200–£250 in the UK, though both appear regularly on sale.
Where to save money:
- Print at home rather than using a print bureau for small runs.
- Use standard 160–200 gsm cardstock from supermarkets or office supply shops for practice runs; save premium stock for final versions.
- Buy blades in multipacks — per-blade cost drops significantly.
Where to invest:
- A quality cutting mat. Cheap mats lose grip quickly and cause miscuts.
- A bone folder. At under £5, it produces crisp folds that no fingernail can match.
For a three-month budget plan: spend the first month on printables only (under £10 total including file costs), the second month adding a cutting machine if the hobby sticks, and the third month experimenting with vinyl and iron-on materials.
Key takeaways
Digital craft projects are accessible to complete beginners using free software, a home printer, and downloadable files from UK sources such as Craftsuprint — with most starter projects completable in under an hour at a low materials cost.
| Point | Details |
|---|---|
| File type determines your tool | SVG for cutting machines; PDF and PNG for print projects; DXF as a legacy fallback. |
| Free software covers most needs | Inkscape and Canva handle the majority of beginner file types at no cost. |
| Test before committing materials | A 30-second test cut or test print on scrap saves wasted cardstock and vinyl every time. |
| Organise files from day one | A landing zone folder and weekly reset ritual prevent hours of lost searching later. |
| Craftsuprint for UK downloads | UK-priced, VAT-handled printable downloads with weekly freebies and beginner-friendly kits. |
Why finishing one project changes everything
Most beginners stall at the research stage. They read guides, watch videos, compare machines, and never actually make anything. The gap between knowing how digital crafting works and feeling like a crafter is exactly one finished project wide.
There is something specific that happens when you hold a thing you made from a file you downloaded. The workflow that seemed abstract — download, prepare, cut, assemble — becomes a repeatable muscle memory. The second project takes half the time. The third one is where you start making deliberate choices about materials and design rather than just following instructions.
The technical friction at the start is not a sign you are doing it wrong. It is the learning curve, and it is shorter than it looks. A misaligned print or a blade that tears rather than cuts is not a failure; it is data. Fix the setting, run the test again, and move on.
Community accelerates this. Sharing a photo of a finished project — even an imperfect one — and getting feedback from other crafters compresses months of solo trial-and-error into days. Craftsuprint’s community features, including contests and the Gold Star programme for designers, give you a ready-made audience for that first share. Start with the simplest project on this list, finish it, and post it. The next one will be better, and you will know exactly why.
Ready to make your first project with Craftsuprint?
Craftsuprint is the practical starting point for UK crafters who want printable downloads without the faff of currency conversion or unclear VAT. Files are priced in pounds, licences are clearly stated, and the catalogue covers everything from beginner greeting card kits to layered SVG ornaments.

New to the platform? The free Create & Craft Members Gift is a low-friction way to try your first download without spending anything. From there, the Create & Craft downloads page gives you access to featured projects and promotional downloads updated regularly. If you need supplies alongside your files, the craft supplies section lists materials from UK sellers. Browse the catalogue, pick one beginner project, and have it printed or cut by this evening.
Useful sources
A short list of reliable resources for deepening your digital craft skills and finding files:
- Your guide to digital paper crafts — Craftsuprint’s overview of 2D paper craft projects, tools, and product suggestions. Bookmark this as your starting reference.
- Printable paper craft guide — step-by-step printable workflows and beginner tutorials on Craftsuprint; particularly useful alongside the workflow section above.
- Handmade paper crafting techniques — techniques and inspiration for when you want to move beyond pure printables into mixed-media work.
- Paper crafts classifieds — UK sellers listing materials, tools, and supplies; useful for sourcing locally.
- Lantern show porcelain series at MySpinShop — curated DIY kits for craft-infused home décor; worth exploring once you are comfortable with basic printables and want to try something more tactile.
- Essential paper crafting resources — Craftsuprint’s resource list for materials and templates, updated regularly.
For licence clarity, always prefer sources that display licence terms on the product page rather than in a separate document you have to hunt for. Craftsuprint displays licence information at point of purchase, which removes the guesswork.
FAQ
Are digital crafts easy to learn?
Yes. Beginners do not need prior design experience — free tools like Canva and Inkscape, combined with ready-made downloadable files, mean most people complete a first project within an hour.
What are some digital crafting examples?
Digital crafting covers printable greeting cards, gift tags, layered paper ornaments, vinyl decals, iron-on transfers, and tech-integrated builds such as LED pixel clocks. Craftsuprint’s catalogue focuses on the printable and paper-cut end of that range, which is the easiest starting point.
How do I make a digital craft project?
Download a file (SVG for cutting, PDF or PNG for printing), open it in Inkscape, Canva, Cricut Design Space, or Silhouette Studio, resize if needed, run a test cut or print, then assemble the finished pieces. The full seven-step workflow is covered in the step-by-step section above.
What is the most popular digital craft right now?
Layered SVG card making and personalised vinyl decals are consistently among the most searched digital craft categories in the UK. Both are beginner-friendly and require only a cutting machine and downloadable SVG files.
What file type should a beginner start with?
PDF is the easiest entry point — open, print, cut by hand, done. Once you own a cutting machine, SVG becomes the most useful format because it scales cleanly and works natively in both Cricut Design Space and Silhouette Studio.