
Fix Cardstock Feeding in 3 Steps for Crafters: Path, Grain, Settings
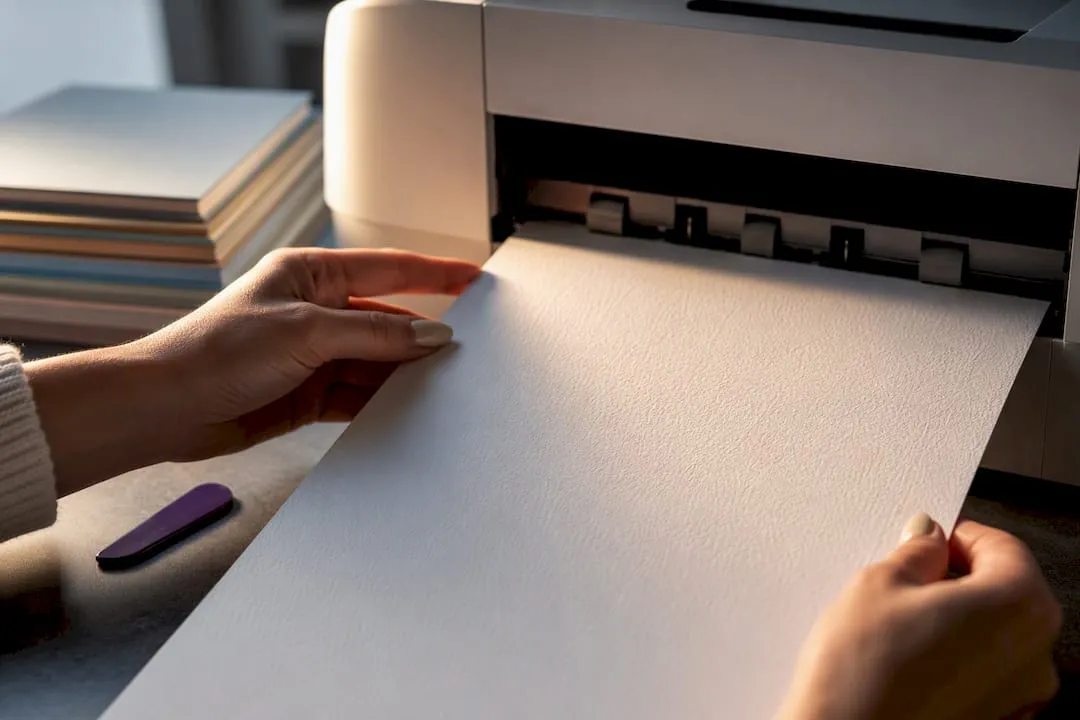
Cardstock not feeding almost always comes down to a mismatch between the card’s thickness, the paper path it’s forced through, and driver settings that still think it’s plain paper. The fastest fix is a single sheet loaded into the rear or manual feed slot with the driver set to “cardstock” or “heavy paper” before you print. If that doesn’t work, a gentle roller clean usually solves what’s left.
TL;DR:
- Most cardstock feeding issues stem from mismatched thickness, incorrect driver settings, or worn rollers, rather than printer malfunction.
- Using the rear or manual feed slot and setting the driver to “Cardstock” or “Heavy Paper” often resolves feeding problems for thicker stocks.
- Checking the actual thickness of the cardstock and ensuring it does not exceed the manufacturer’s recommended maximum (typically around 0.30mm) prevents jams.
- Proper loading techniques involve fanning sheets, aligning guides snugly without pinching, and verifying printable sides are correct for the paper path.
- Regular roller cleaning, only when necessary, and storing sheets flat in a dry environment help maintain consistent cardstock feeding.
Table of Contents
- Quick checklist to try before anything else
- Why won’t cardstock feed properly? A deeper look
- Building a maintenance routine that prevents repeat jams
- When your printer is the real problem
- Should you stick to manufacturer-recommended cardstock?
- What crafters usually get wrong about cardstock printing
- Ready to print your next project without the guesswork?
- Where this guidance comes from
- Sources
- FAQ
Quick checklist to try before anything else
Work through these in order. Most cardstock jams clear up within the first three steps, so don’t jump straight to dismantling anything.
- Use single-sheet manual or rear feed if your printer has one. It gives cardstock a straighter run and avoids the tight curve that causes buckling.
- Change the driver’s media type to “Cardstock,” “Heavy Paper,” or the closest option in the print dialogue. Drivers don’t detect this automatically, and the wrong setting is one of the most common reasons feed fails outright.
- Fan the sheets before loading, and if you’re using the main tray, keep the stack to 5–10 sheets. Static causes cardstock to stick together far more than ordinary paper.
- Check the guides sit snugly against the stack, not so tight they pinch, and confirm the printable side is facing up (or down, depending on your model’s path).
- Inspect the rollers for dust, ink residue, or a shiny, polished look. If they look dirty, wipe them with a lint-free cloth lightly dampened with distilled water, since this clears many false jam warnings.
- Power-cycle the printer to reset any stuck sensor readings, then run one test sheet before loading a full batch.
Pro Tip: Keep a “test sheet” of scrap cardstock by the printer. Running it through first, on its own, tells you within seconds whether the fix worked, without risking a sheet you’ve already printed a design onto.
Why won’t cardstock feed properly? A deeper look
Cardstock feeding problems usually trace back to one of five things: the media exceeding your printer’s specs, the wrong paper path, poor loading technique, incorrect driver settings, or worn rollers. Working through them in order saves time.
1. Check your printer’s actual specs. Most home inkjets and lasers list a maximum gsm or thickness in the manual, and it’s often lower than crafters expect. Standard printer paper sits around 80gsm; card stocks used for handmade cards often run 200 to 300gsm. Thickness matters just as much as weight here. Manufacturer guidance from Lexmark notes that media thicker than 0.30mm can cause feed reliability problems, and two stocks with identical gsm can still differ in thickness enough to change how they behave in the rollers.
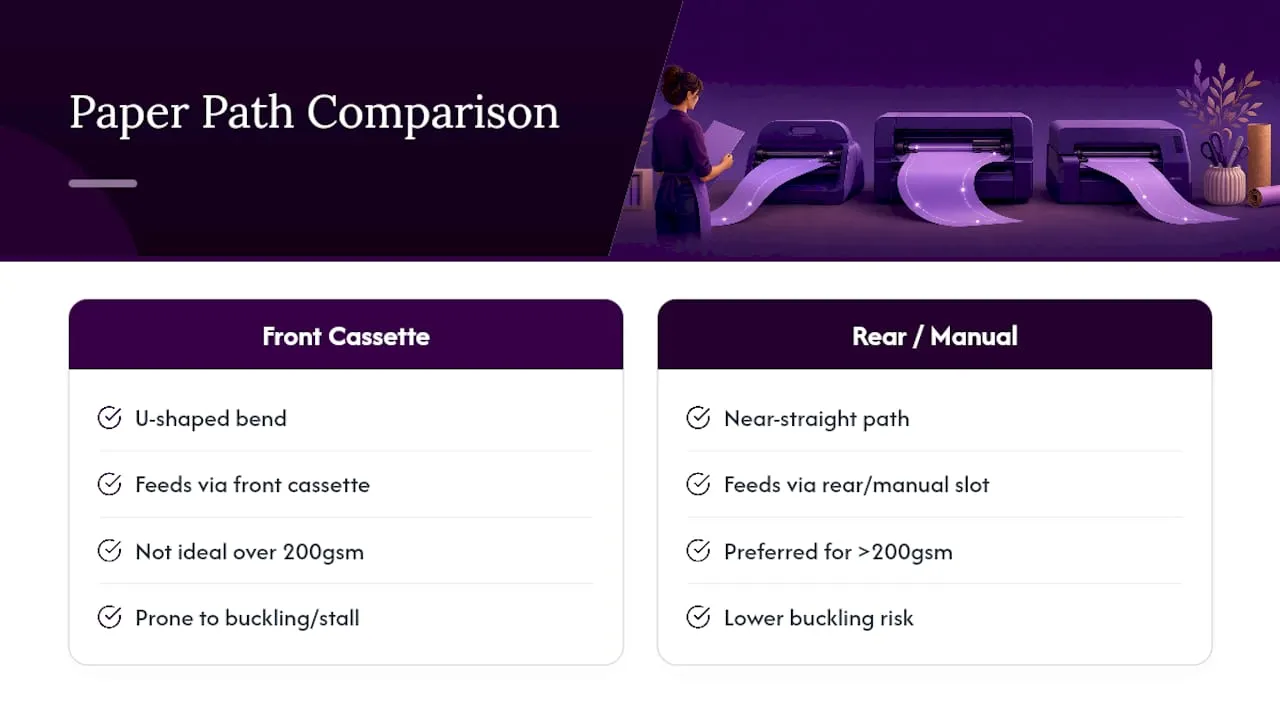
2. Identify your paper path. Front-loading cassette trays usually route paper through a U-shaped bend before it reaches the output tray. That curve is fine for 80gsm paper but forces stiffer cardstock to buckle or stall partway through. A rear or manual feed slot sends the sheet almost straight through the machine, which is why it’s the preferred route for anything over about 200gsm.
3. Get your loading technique right. Fan the sheets to separate any stuck together by static, square them up, and load with the printable side correctly oriented for your model. Grain direction plays a bigger role than most people realise. Grain running “short” (parallel to the shorter edge) tends to bend more easily through the path and resists curling better than grain running “long.” You can test grain by gently flexing the sheet both ways; it bends more readily along the grain.

4. Set the driver correctly, every single time. Select the exact paper size and set the source to “manual feeder” if you’re using rear feed. Choosing “Cardstock” or “Heavy Paper” changes roller speed, pressure, and fuser or ink behaviour to suit the thicker stock. Many drivers reset to the default paper type after each job, so don’t assume yesterday’s setting carried over.
5. Inspect and clean the rollers, carefully. Dust and paper fibres build up on pickup rollers over time, reducing grip. A soft, lint-free cloth with a little distilled water usually lifts this off. Avoid cleaning more than necessary, though, since the process gradually wears the rubber surface down.
Roller wear is cumulative: manufacturer guidance makes clear that cleaning the rollers too often causes the same gradual wear you’re trying to prevent, so treat it as an occasional fix, not a routine chore.
6. Rule out a false jam. If the printer reports a jam but nothing is visibly stuck, power the unit off, remove any partially fed sheet, and restart before trying again. This kind of timeout error happens when the rollers can’t pull the heavier sheet through within the machine’s pre-set pickup window, and it’s often mistaken for a genuine paper jam.
What the symptoms usually mean: rollers humming with no sheet movement points to worn or glazed rollers rather than a settings issue. A jam that happens consistently at the same curved point in the path signals the sheet is too stiff for that route. Multiple sheets feeding together almost always means static or a stack that wasn’t fanned properly.
Building a maintenance routine that prevents repeat jams
A little routine care goes a long way toward keeping cardstock feeding reliably.
- Clean rollers roughly three times more often when you’re printing cardstock regularly, but only when they actually look dirty or you notice slipping. Don’t clean on a fixed schedule regardless of need.
- Store sheets flat, away from humidity, and add a silica gel sachet to your storage box if you’re in a damp room. Curled cardstock is one of the most common feed complaints crafters report.
- Let printed ink dry fully before stacking finished sheets, since damp ink transfers and warps the card beneath it.
- Run a sacrificial test sheet every time you switch from plain paper to cardstock, or between different cardstock brands, since thickness and surface finish vary more than people expect.
- Print in smaller batches for long runs, pausing every 15 to 20 sheets to let the rollers and fuser cool and reset.
Pro Tip: Matte and vellum-finish cardstocks generally feed more reliably than glossy or heavily textured ones, since glossy coatings can reduce roller grip. If you’re choosing stock specifically for printing, prioritise a smoother matte finish and grain running short.
When your printer is the real problem
Sometimes the issue isn’t technique. If cardstock still won’t feed after you’ve corrected the settings, path, and loading, and the problem repeats consistently, the printer itself may be the limiting factor. Glazed or worn rollers, visible shine or smoothness on the rubber, usually need replacing rather than cleaning, and no setting will fix that.
If you’re shopping for a printer that handles cardstock better, prioritise a model with a genuine rear or straight-through manual feed, a published gsm or thickness spec (not just “supports cardstock” marketing copy), and a higher duty cycle rating. General home inkjets vary hugely here; models built with photo or small-production printing in mind tend to handle heavier stock far more consistently than budget all-in-ones.
Should you stick to manufacturer-recommended cardstock?
Printer manufacturers publish approved media lists for a reason: they’ve tested those specific weights, thicknesses, and finishes against their own roller mechanisms and fuser or ink systems. Straying too far outside those specs, especially on thickness, is a common reason cardstock not feeding becomes a recurring issue rather than a one-off.
That doesn’t mean you need to buy an expensive branded cardstock for every project. It means checking the actual gsm and thickness of whatever you’re using against your printer’s published maximum, rather than guessing. Craft-specific cardstocks vary widely, and a 250gsm stock from one supplier can behave completely differently to a 250gsm stock from another, depending on how it’s calendered and coated. If you keep hitting problems with a particular brand or finish, that’s worth noting and switching before you assume the printer itself is faulty. When you do find a stock that feeds reliably in your machine, stick with it for template downloads and repeat projects rather than experimenting mid-batch.
What crafters usually get wrong about cardstock printing
Most feeding complaints trace back to two things: coated or heavily textured stock fighting the rollers for grip, and sheets that curled slightly in storage before they ever reached the tray. Both are easy to miss because they look fine to the eye until the printer struggles.
Templates are tested against typical home-printer paper paths before publishing, and recommended stock finishes behave predictably on standard inkjets and lasers. If you want the fuller settings breakdown, the printer settings guide for card printables covers driver options specific to craft projects in more depth.
— Rob
Ready to print your next project without the guesswork?
Once your printer is feeding cardstock reliably, the next question is what to actually put through it. The marketplace offers templates and kits designed with printable card projects in mind, so users work with proven files rather than testing random downloads against printer quirks.

Start with the printer settings guide for card printables to match your driver options to whatever stock you’ve settled on, then browse the card making collection for templates worth testing your setup against. If you’re stocking up on stock itself, the cards and paper range covers common weights and finishes for home printing. Download a sample template, run your test sheet first, and you’ll know within minutes whether your settings are dialled in before committing a full print run to it.
Where this guidance comes from
- HP community: OfficeJet Pro 8740 cardstock feed thread covers driver settings and roller cleaning.
- Lexmark: tips on using card stock sets out thickness thresholds and grain guidance.
- Epson support: paper feed issues details loading technique and sheet limits.
Sources
- Office Jet Pro 8740 won’t feed cardstock (HP community)
- Lexmark hardware: tips on using card stock
- Epson support: paper feed issues
FAQ
Why won’t my printer feed the paper properly?
Feed failures usually come from a mismatch between the paper’s thickness and the printer’s expected range, dirty or worn pickup rollers, or driver settings still set to plain paper. Working through media type, path choice, and roller condition in that order resolves most cases.
How do I fix “no paper fed” errors on my printer?
Power-cycle the printer to clear the error, remove any partially caught sheet, and try again with a single sheet loaded in the manual or rear feed. If the error repeats, clean the pickup rollers with a lint-free cloth and distilled water, since dust build-up commonly triggers this false alert.
How do I feed cardstock through a printer correctly?
Load one sheet at a time into the rear or manual feed slot where your printer has one, since this gives thick stock a straighter path than a curved cassette tray. Set the driver’s media type to “Cardstock” or “Heavy Paper” and confirm the exact paper size before printing.
Why is my cardstock jamming in the printer?
Jamming usually means the stock is thicker than your printer’s rated maximum, which manufacturer specifications put around 0.30mm for many models, or that it’s being forced through a tight curve in the paper path. Switching to manual or rear feed and checking your card’s actual thickness against your printer’s spec sheet usually clears it.
Does Craftsuprint offer templates that work with home printers?
Yes. Craftsuprint’s card making downloads are checked against typical home-printer paper paths, and the site’s printer settings guide walks through matching driver options to your chosen cardstock.